How To Repair Gel Coat Scratches
Deep scratches in the gel coat of fiberglass boats can be incredibly frustrating for the owner, and they often occur due to accidental mistreatment or improper maintenance. Luckily, with your expertise and the right tools, you can make your customers’ problems disappear, just like the gel coat scratches.
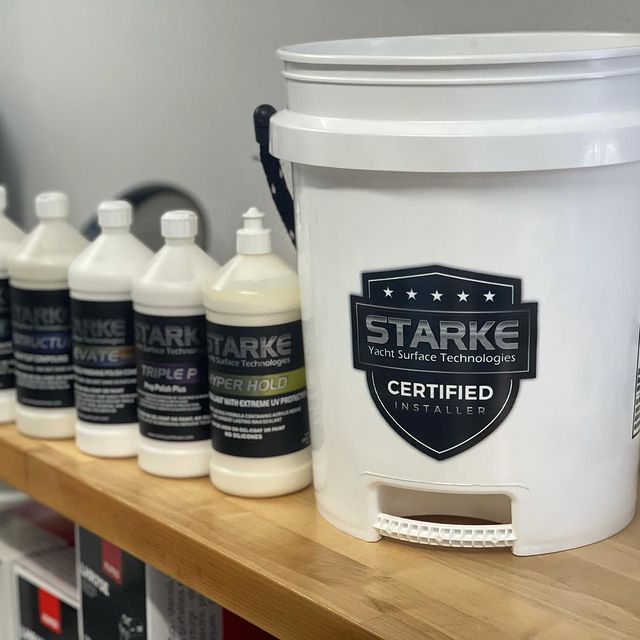
What You’ll Need – Recommended Supplies
Before you get started on removing the gel coat scratches for a customer, take a quick look at what you have on hand to ensure you have all the necessary supplies to complete the job. You want to go through the steps in a timely manner for the best results, so it’s best to avoid pausing a job to get new tools or supplies. Here’s what you’ll need:
- FLEX XFE15 150 Cordless Orbital Polisher
- FLEX Cordless Rotary Polisher PE 150 18.0-EC Set
- Rupes Big Foot LHR 21ES Mark 3 Random Orbital Polisher
- 7.5” x 1.5” Lake Country Single Sided Wool Cutting Pad
- Lake Country Blue Hybrid Knitted Wool Cutting Pad
- Lake Country HDO Blue Heavy Polish Pad
- Starke Yacht Care Level R Heavy Cut Compound
- Starke Yacht Care Elevate Medium Cut Compound
- Starke Yacht Care Ignition Finishing Polish
- Sandpaper Mirka 6” Abralon Foam Grip Mesh Abrasive Disc
Step 1: Wet Sanding

Grab your FLEX XFE15 to start the wet sanding process. We recommend using this instead of the Alburnett ACE because the FLEX XFE15 is meant for wet sanding specifically. Before you start sanding, be sure to wet the area to avoid your sandpaper getting clogged easily. Then, attach a 6” Abralon Disc with 1,000 grit to begin sanding.
Move the polisher back and forth in a consistent, smooth pattern, similar to if you were mowing a lawn. Be sure to apply even pressure but don’t move too quickly; run the machine at a 2 or 3. Once you have sanded the surface with the 1,000-grit paper, switch to a 2,000 grit sandpaper to remove the scratches even further. If you still see surface scratches, you’re not done sanding, so keep repeating the process until the scratches are gone. At your discretion, you can complete this process a 3rd time with 3,000 grit sandpaper, which will make the polishing process a breeze.
Step 2: Compounding

For this step, you’ll need the FLEX Rotary Polisher, a Single-Sided Wool Cutting Pad, and Level R Heavy Cut Compound. Put a line of Level R in areas where light scratches still need to be buffed out (Note: if the scratches are too deep, you’ll need to go back to wet sanding), and use the polisher with the wool cutting pad attached to distribute the compound and remove scratches. Occasionally, you can speed up the machine to heat up the surface and melt down the resin if needed.
Step 3: Finishing Compound

As you move into Step 3, switch out the single-sided wool cutting pad for the Lake Country Blue Hybrid Knitted Wool Cutting Pad and use the Elevate Medium Cut Compound. The qualities of this pad, mixed with the Elevate Compound are going to give the perfect glassy finish. Slowly work the compound into the surface, and once it’s distributed evenly, turn up the speed of the rotary polisher to continue melting down the resin. After this step, all scratches should be removed.
Step 4: Polishers

The final step in the process requires the Rupes Orbital Polisher, a Lake Country Heavy Polish Pad, and the Starke Yacht Care Finishing Polish. Instead of putting the finishing polish on the vessel directly, put a few large dots on the polish pad. The polish goes far because these pads are dense and won’t soak up the polish, meaning your materials last longer and end up on the boat instead. Run the machine at a 3 or 4 to ensure you’re getting enough spin, and slowly work the product onto the surface of the boat exterior. Once you have completed this step, wipe down the surface with a microfiber cloth and admire your smooth finish.
Preventative Care
In order to avoid the above process altogether, there are some critical steps boat owners can take during the year to ensure their vessel stays bright, shiny, and scratch-free:
- Store the boat properly. This means rinsing off all saltwater after each day on the ocean, parking the boat next to a wall or in a storage shed where it is protected from UV damage, and avoiding storing it under trees where leaves, branches, and pine needles can scratch it.
- Each spring, encourage your customers to treat their boat with a thorough wash, followed by an oxidation remover and a buffer. While it’s not the most fun process, it’s critical to bringing back the shine after a long winter.
- Remove stains with soft cloth when they occur then add a coat of wax to seal in the shine!
Final Thoughts
Removing scratches from the gel coat of a boat can be a bit time-consuming and require some elbow grease, but it’s not a difficult process. If a customer brings in a boat that needs a little love, refer to the above steps to help bring its shine back. The best thing any boat owner can do is follow proper prevention and maintenance steps to avoid scratching the gel coat, but stuff happens, and when it does, you’ll be ready for it.
Interested in learning more about Gel Coat restoration? Watch our YouTube video by clicking the link below!
About Marine Detail Supply Tampa Bay:
We're Tampa Bay's number one source for boat detailing supplies. We'll price match any competitor and give you the best pricing, quick same-day shipping, and the highest level of support.