News

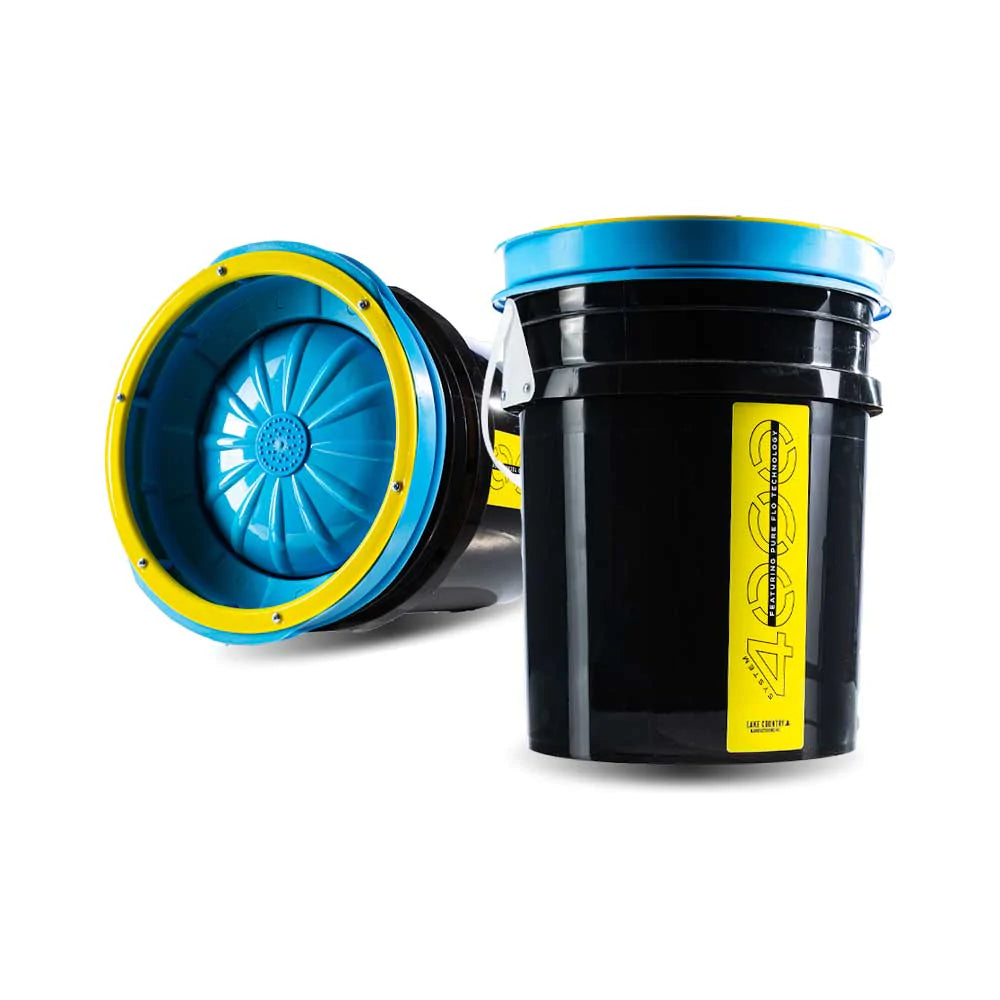
Easy Way To Clean Boat Detailing Pads
Hey guys, I'm super excited to bring you a product review today on the Lake Country System 400, a simplified pad cleaning system that will save you time and money. I have to admit I dragged my feet a bit on testing this product since I was comfortable in my pad cleaning routine and didn't feel the need to change it. I've got to say, though, that I wish I had tried the Lake Country System sooner, and I will definitely integrate it into my daily routine from now on.
What is the Lake Country System 4000 Pad Washer?
The Lake Country System 4000 pad washer may not look like much from the outside, but I believe it revolutionizes the pad cleaning process. It's an all-in-one cleaning system that pumps clean water onto cutting and polishing pads. It contains dirty runoff without leaving you drenched and dirty.
How does the Lake Country System 4000 Pad Washer work?
Using the Lake Country System is incredibly quick and easy, cutting the time you spend on your boat detailing routine in half. To use, fill the bucket about halfway with clean water and your favorite cleaning solution. On the lid, you will see there is a pump with grooves along the side, which ensure a deep clean.
With your pad, push down on the pump; as you do so, you will notice the cleaning solution sprays from the side, dampening the pad. Once wet, turn it on and rub against the side of the lid, starting at the lowest setting and turning it higher after a few moments.
The dirty water is collected inside the system, keeping it from spraying out and drenching you as you clean. Depending on how dirty your pad is, you can repeat this process as needed. I love how the Lake Country System works with both wool and foam pads of varying sizes, making it a versatile solution for all your pad cleaning needs.
How does the Lake Country System 4000 Pad Washer save you time?
In the past, cleaning your foam and wool pads was a tedious process that was often left after a long day's work. I really like how compact the Lake County System is, so you can bring it with you and quickly clean your pads as you go, eliminating the dreaded end-of-day cleaning session, where it would take forever to spin them out.
I can't tell you the number of times I've looked at my dirty pads after a long day and decided to deal with them in the morning. The Lake Country System makes cleaning your pad easier since you can do it as you go, so you don't have to fight with dried-out compound and oxidation.
Conclusion
The Lake Country System 4000 Pad Washer is an excellent piece of equipment to make cleaning your pads faster and easier. At only $190 with free shipping, it saves you time and money and is worth the investment! I would definitely recommend picking one up; you'll be glad you did!

How to Repaint an Outboard Motor
A lot of people are unsure which product to use to correct the imperfections on their outboard motor, so they settle for swirls and surface imperfections. In this blog post, I'll walk you through identifying whether your motor has gel coat or paint and which products work best to create shine and restore its depth and vibrancy.
Is your Outboard Gel Coat or Paint?
It's important to identify the type of paint on your outboard engine. Determining whether your outboard has a gel coat or paint will help you choose the right products in the revitalization process. There are two easy methods to use that will quickly tell you which finish you're dealing with.
Method One
Using a white cloth, use rubbing alcohol on an inconspicuous area, rubbing it in a circular motion. If the surface begins to shine, you most likely are dealing with a gel coat paint job.
Method Two
Rub a piece of sandpaper over a smooth area. If it doesn't pull or snag any surface fibers, it's most likely a gel coat.
What do I need for an Outboard Paint Correction?
If your outboard motor is painted, you'll need only two items to correct surface imperfections that have developed. I've found great success using Koch Chemie Micro Cut with a PXE 80 and a 3-inch HDO orange pad. I like this combination because it's a little bit less aggressive while still providing excellent results.
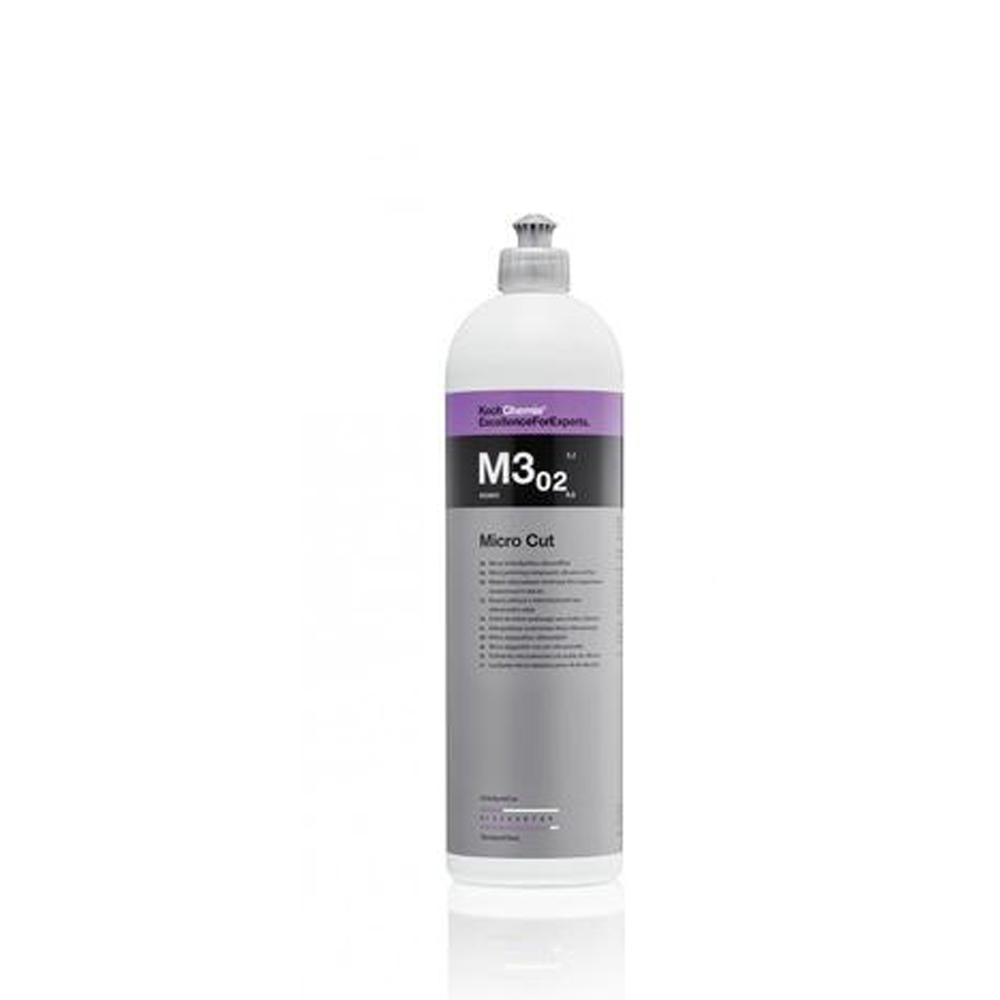
To use, apply a few dabs of product onto the pad and apply in a circular motion. You will quickly notice the swirls and imperfections disappear, and you're left with a shiny surface full of depth that looks virtually brand-new. Finish by wiping away any excess with a clean, dry cloth, and you're done!
Additional Tips for Outboard Paint Correction
- Use a hair dryer or heat gun to remove any decals prior to correcting. Take your time and use a razor paint scraper to remove them once warmed. Remove any remaining glue with Goo Gone or acetone.
- Always repair any damage before beginning your paint correction. I like marine-Tex, a repair filler found online or at marine supply stores, as it works well for smaller blemishes and cracks.
- Thoroughly sand and clean all repair areas prior to painting to ensure a seamless finish.
- Paint spraying will help you avoid streaks and provide professional-looking results.
- Always apply several thin coats of paint to avoid a "foggy" or "misty" appearance, finishing with a gloss clear coat for unbeatable shine.
- For applying decals, use a solution of water with ONE DROP of Dawn dish soap to wet the surface. Doing this will allow you to position the decal and move them around without tearing and ensure there are no air bubbles.
Conclusion
Your outboard motor gets a lot of abuse, causing swirls and imperfections to arise. You can correct minor swirls and imperfections in the paint quickly and easily, using Koch Chemie Micro Cut with a PXE 80 and a 3-inch HDO orange pad. With only a few simple steps, you can ensure your motor looks newer for longer with superior shine and vibrant colors you can be proud of.

Introducing the Starke Yacht Care Quick Connect!
What is the Starke Yacht Care Quick Connect system?
The Starke Yacht Care Quick Connect system is every detailer's go-to system for detailing their yacht with precision while being efficient. With five different pads, double-sided foam, and a variety of colors, our one-and-a-half-inch white wool buffers are easy to put together and get started to buff the lining of your yacht.
How does the Starke Yacht Care Quick Connect system work?
Start with your selection of wool and switch as needed. With a quick push-in and pop-on, our buffers install with a simple yet straightforward approach. Whether you're starting with a heavier-duty clean or are adding finishing touches to your detail, the process of getting your tools in order shouldn't take longer than the actual job itself. Our adapters last for a lifetime and work with any of our buffers.
How can the Starke Yacht Care Quick Connect system save you time?
Switching from different buffers is made simple with the Starke Yacht Care Quick Connect adaptor by simplifying the process from the start. Where most buffers require external tools, our simple, hexagonal, push-and-snap approach saves time by removing extra steps or unnecessary boat detailing supplies.
Conclusion
Whether you're shopping online with us or seeing our products in the store, you're bound to enjoy all your yacht has to offer with the help of Starke Yacht Care Quick Connect system to get you buffing and out on the water in no time.https://youtu.be/smAwRFaZeXQ

What are Marine Detailing Compounds?
If you ever wonder how the shiny boat you see out on the water keeps its shine, proper marine detailing is the answer. Though there are multiple steps to fully detailing a vessel, compounding is the first step. Marine compounds range in type and use, but at a high level, they are used to get damage, oxidation, scratches, and other dirt or grime off of the gel coat of your boat. Once the compounding is done, you can follow it up with polishing and finishing process to get the shine, but without compounding as the first step, you’ll never solve the root of the problem.
When Should I Use a Compound?
As mentioned, compounding should be the first thing you do when completing a detailing job. The abrasive properties of compounds help remove scratches, scuffs, damage, and oxidation from your boat. This type of damage can pile up; with sun rays, salt in the water, and other harmful materials, your boat is up against a lot.
Compounding will give an even, clean surface to continue the detailing job with. It may require a bit of time and extra elbow grease, but the longevity of your vessel depends on regular compounding to keep its gel coat protected.
Types of Compounds
The number of compounds on the market can get overwhelming, but once you start getting a feel for the products you like and the problems they solve, everything will fall into place. Compounds usually come in one of three types: light compounds, medium-cut compounds, and heavy-cut compounds. The worse the damage that you’re addressing, the heavier cut compound you will need.
Light Compound

Light compounds are great for removing minor scratches and scuffs, but will not be able to tackle the same level of damage that heavier compounds will. Many light compound products also work as finishing polishes, reducing the amount of time it takes to touch up that shine on your boat. One of our favorite light compounds is Starke Ignition Finishing Polish. This 2-in-1 product is wonderful to have on hand at all times.
Medium-Cut Compound
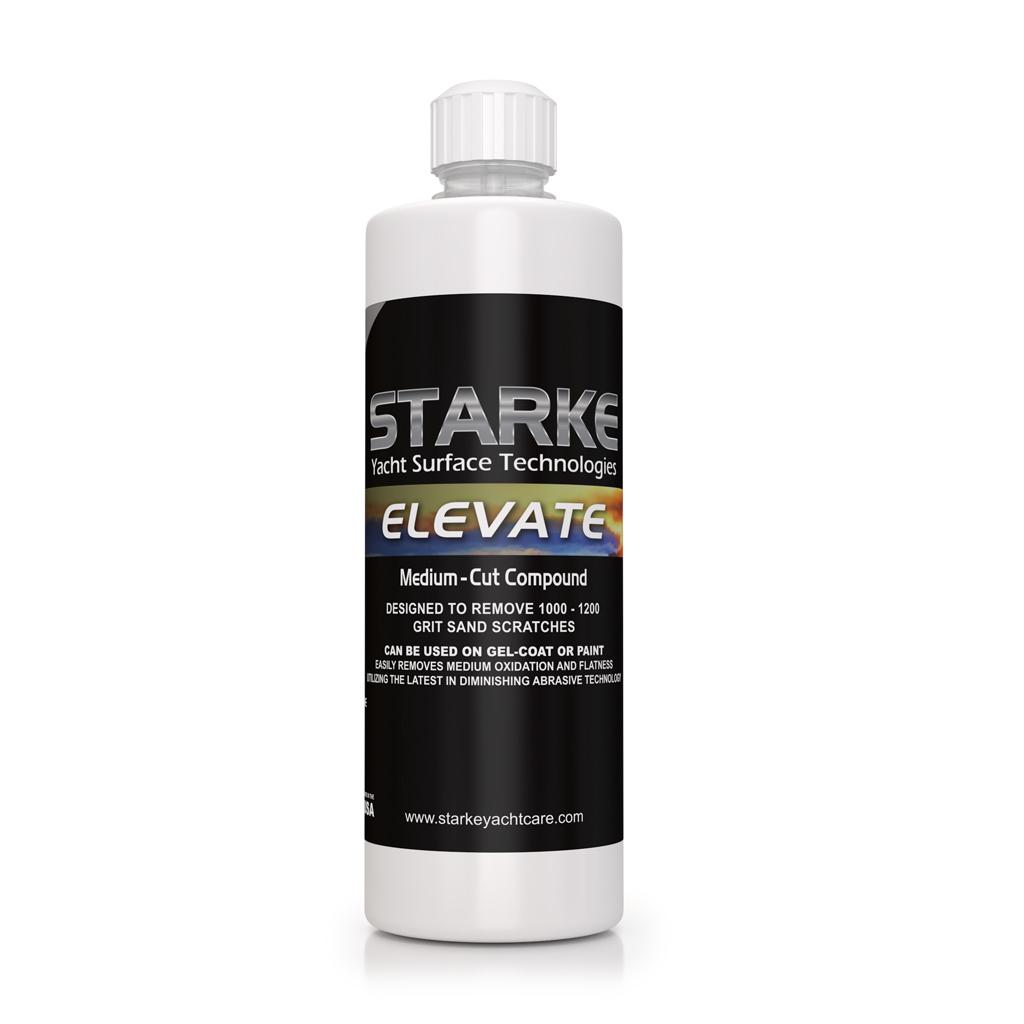
When addressing more advanced scratches, a medium-cut compound can work through damage with ease. This is also a great product to use when following up after a heavy compound, trying to reduce finer lines and swirls before polishing. If you’re looking for a trustworthy medium-cut compound, check out Starke Elevate Medium Compound.
Heavy-Cut Compound

For those big scratches or majorly damaged areas, a heavy-cut compound is the first line of defense. Once you’ve sufficiently worked the solution into the boat and reduced the scratches, you can move to a lower-level compound to address what’s left. We recommend Starke Level R Heavy Cut Compound.
Don’t Skip the Compounding Step
It might take some time to get an idea as to which compounds work best in certain instances, but whatever you do, start with compounding. If you skip ahead to polishing and finishing, you will simply be covering up the damage, not fixing it.

Preparing for Shrink Wrapping Season: Getting Boats Ready for Winter Storage
When it comes time to pull your boat out of the water at the end of the season, taking a few diligent precautions will help ensure that it is as good as new when you’re ready to get back out there next year. Shrink wrapping is a great way to protect your boat from UV rays, water, and other damage while it’s waiting for the summer season.
Dealing with gel coat scratches from last season? Check out how to easily restore your boat's natural shine here!
What is Shrink Wrapping?

When you use saran wrap to put away leftovers in the fridge, the way it clings to the bowl is similar to how shrink wrap for your boat works. Shrink wrapping with marine shrink wrap is the process of fully covering your entire boat with a layer of protective material that blocks out cold air, heavy rains, and even sunlight during the winter season. In addition to regular boat maintenance, shrink wrapping prepares your boat for winter and offers stronger protection than just putting your boat into storage.
Why Should You Invest in Shrink Wrapping?
Shrink wrapping can be expensive; it’s definitely an investment, but your boat isn’t cheap either, so protecting it well is always worth it. When it’s out of use for months at a time, often in harsh weather conditions, shrink wrap can protect it from many types of damage. Unlike using a tarp or something similar, shrink wrap can essentially guarantee your boat’s protection. You can wrap it, put it away, and forget about it until next year, all without losing any sleep at night.
If you don’t shrink-wrap it, then leave it to be forgotten for half of the year, you could pull it out next season and discover some pretty gruesome damage. People have found rodents in their engines, pooled water in the inside of their boats, causing damage, and more. Almost all of those problems will cost more to fix than simply shrink-wrapping your boat in the first place.
How do You Shrink Wrap a Boat?

If you want shrink wrapping done right, we recommend taking it to a professional for wrap services. Sure, you might have a slightly higher cost associated with the process than if you did a DIY approach, but the peace of mind is well worth it.
If you do want to try shrink-wrapping on your own, it’s doable. First, bring your boat to a clean, dry place, and give it a good cleaning before you get started. Then, drain and plug your fuel vents with shrink wrap tape. Pad sharp corners or objects with towels or foam protection, put up two poles in the center of your boat as supports, and attach those supports to the boat with straps. Now you’re ready to wrap your boat with shrink wrap, apply a heat gun to seal it, and tape over any holes or weak spots to finish it off.
How Else Can You Prepare for Winter Months?
Besides shrink wrapping, some quick boat maintenance can make a big difference in getting your boat ready for winter storage. Thoroughly cleaning the inside and outside of the boat is a great place to start. Then, give the engine a freshwater rinse with a bucket or garden hose and make sure everything is completely dry. Finally, change the engine oil and add a fresh fuel stabilizer before putting your boat away until next time. As an added bonus, you’ll get to unwrap it like a present next boating season!
For more boat detailing and maintenance tips, check out our 2022 tips and tricks here.

What are Marine Sealants?
Boats are unique to own and work on because, although they are made for water, there are plenty of places on a boat that water needs to stay out of. You don’t want water getting through the boat’s windows, but you also don’t want it dripping into a fuel line accidentally. To protect your boat in the areas that need it most, marine sealants are the best tools.
There are many different options when it comes to picking out a marine sealant, but these sealants can serve many purposes on your boat. Since there are so many marine sealants on the market, learning how to use them properly is critical.
What do they do?
Sealants create a bond between two surfaces or materials on your boat. You can use sealant to bond metal to glass, wood to plastic, wood to wood, and more. Unlike glue, which ends up drying into a stiff and brittle material, sealants dry as thick and rubbery, making them much more flexible and better for many marine applications. Sealants can also be used as a top layer to protect the gel coat or outer surface of your vessel.
If there’s a spot on your boat that you need to keep water or air out of, then you need a sealant. You can even use some sealants below the water line, but be sure that you get a sealant that was made specifically for that purpose.
How long do they last?
The lifetime of a sealant will depend on the product itself. Some sealants offer temporary bonding that can last a number of years, while others will bond permanently. If you use a sealant that bonds permanently, then decide to remove it later, you’ll need to use a special sealant remover to do so.
If you’re not sure if your sealant needs to be replaced, keep an eye out for water leakage or dirt trails. If dirt starts collecting in or around your sealant, it could break the seal and remove the area’s water and air tightness. Or you might notice that water is already getting through a seal than it shouldn’t, which is a great clue that it’s time for new sealant.
How to apply a sealant
Sealants can come in adhesive and non-adhesive forms. Adhesive sealants will bond materials together without the help of anything else, whereas non-adhesive sealants require bolts or other bonding mechanisms to finish the job.
If you are using sealants to protect flat surfaces, you can use your random orbital polisher for a smooth, even application. Simply put the sealant on a pad and apply it to the target surface with steady speed and pressure.

-
Hand Application
To bond two materials together, you’re probably going to have to put the sealant on by hand. Most bottles of sealant will have a thin nozzle that you can use to get the product in tight spaces.
No matter how you apply your sealant, be sure to give it ample time to bond. Sealant can require a number of days to fully finish setting, so read the instructions listed on the bottle.
Starke Yacht Care Hybrid Marine Sealant

Best to use with a random orbital polisher, this sealant is great for the larger surfaces on your boat. It acts as a wax and a sealant, so your boat will have a great shine and your gel coat will be protected from water, salt, and other potentially harmful debris.
Starke Yacht Care Hyper Hold Marine Sealant

You can apply this sealant by hand or with a machine, but either way, it’ll offer a great hold and last a long time. It is long-lasting and provides protection against UV rays as well as water.
Seal It or Deal with It
Sealants help protect boats against water, air, and other materials that could potentially damage them. You can use sealant on your gel coat or in between two materials that need to be bonded together. The market has many types of sealants that can be used for different purposes, so reading the label on each bottle is always a good idea.

Best Ceramic Coatings to use in 2022
Though it started out as a way to protect cars from sun damage, scratches, dirt, and more, ceramic coating has become very prominent in the boating world as well. A good ceramic coat can provide the ultimate protection to a boat, shielding it from scratches, fish blood, dirt, and many other things that come with dropping into the water. If you’re not sure where to start, you’re in the right place!
What are Ceramic Coatings?
Ceramic coatings are one of the best forms of protection for any boat. They can come as sprays, droppers, or even gels, and can be applied to the surface of the boat, protecting its paint and finishing from bird droppings, dirt, salt, and sun damage. Ceramic coats often last for a year or more, meaning fewer detailing jobs, tiresome cleaning, and re-polishing will be needed.
Why Should You Ceramic Coat Your Boat?
If you truly love your boat, put a ceramic coat on it. It’s no question that boats go through some serious conditions: acid rain, saltwater, hours in direct sunlight, animals, and debris, but with a ceramic coat, your boat will be protected from all of that.
Choosing the Right Ceramic Coating

There are a lot of ceramic coatings on the market right now, so it’s tough to decide which is best. We’ve tested many of these products, and the three that always impress our detailers the most are Liquid Thor, Repel Pro, and Liquid Kraken. We’ll break down some of the best features of each below.
Liquid Thor

The Liquid Thor ceramic coating is one of the easiest ceramic coats to apply. It has a great work time and won’t dry out, allowing you all the time in the world to get it applied perfectly. During the application process, tons of nanoparticles and UV inhibitors will transfer to the surface of your boat, locking onto the gel coat, marine paint, glass, or other surface to offer protection against even the harshest of elements.
Repel Pro

Best used in areas where the finest boat surface protection is required, Repel Pro offers true 9H hardness, which will come in handy if your boat is put to the test. A guarantee is offered when using Repel Pro with marine paint, but even gel coats will enjoy 2-3x more durability than other polymer-based sealants. For even better results, consider pairing this coating with Starke Replenish Silica Spray.
Liquid Kraken
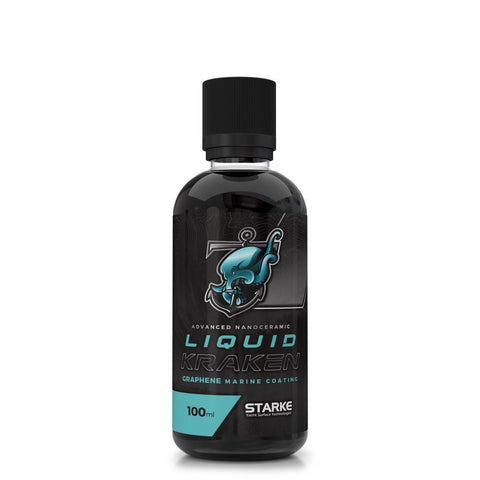
With roughly 12-24 months in between coats, we love the Liquid Kraken ceramic coating because it lasts. Additionally, it has a high concentration of graphene oxide which creates an impressive layer of protection that is one atom thick. With Liquid Kraken on board, you’ll notice a reduction in water spots by about 50%, and if that doesn’t make it all worth it, then nothing will.
Don’t Wait Until It’s Too Late
Every time your boat leaves storage, it’s at risk for damage. Falling leaves, dirt on the boat trailer, rough waters, and of course, the sun, can all wreak havoc on how your boat looks, feels, and operates. With the right ceramic coating, you can protect your boat from the elements, making it last longer and function optimally. Don’t wait until something goes wrong to put a ceramic coating on it – prevention is best!

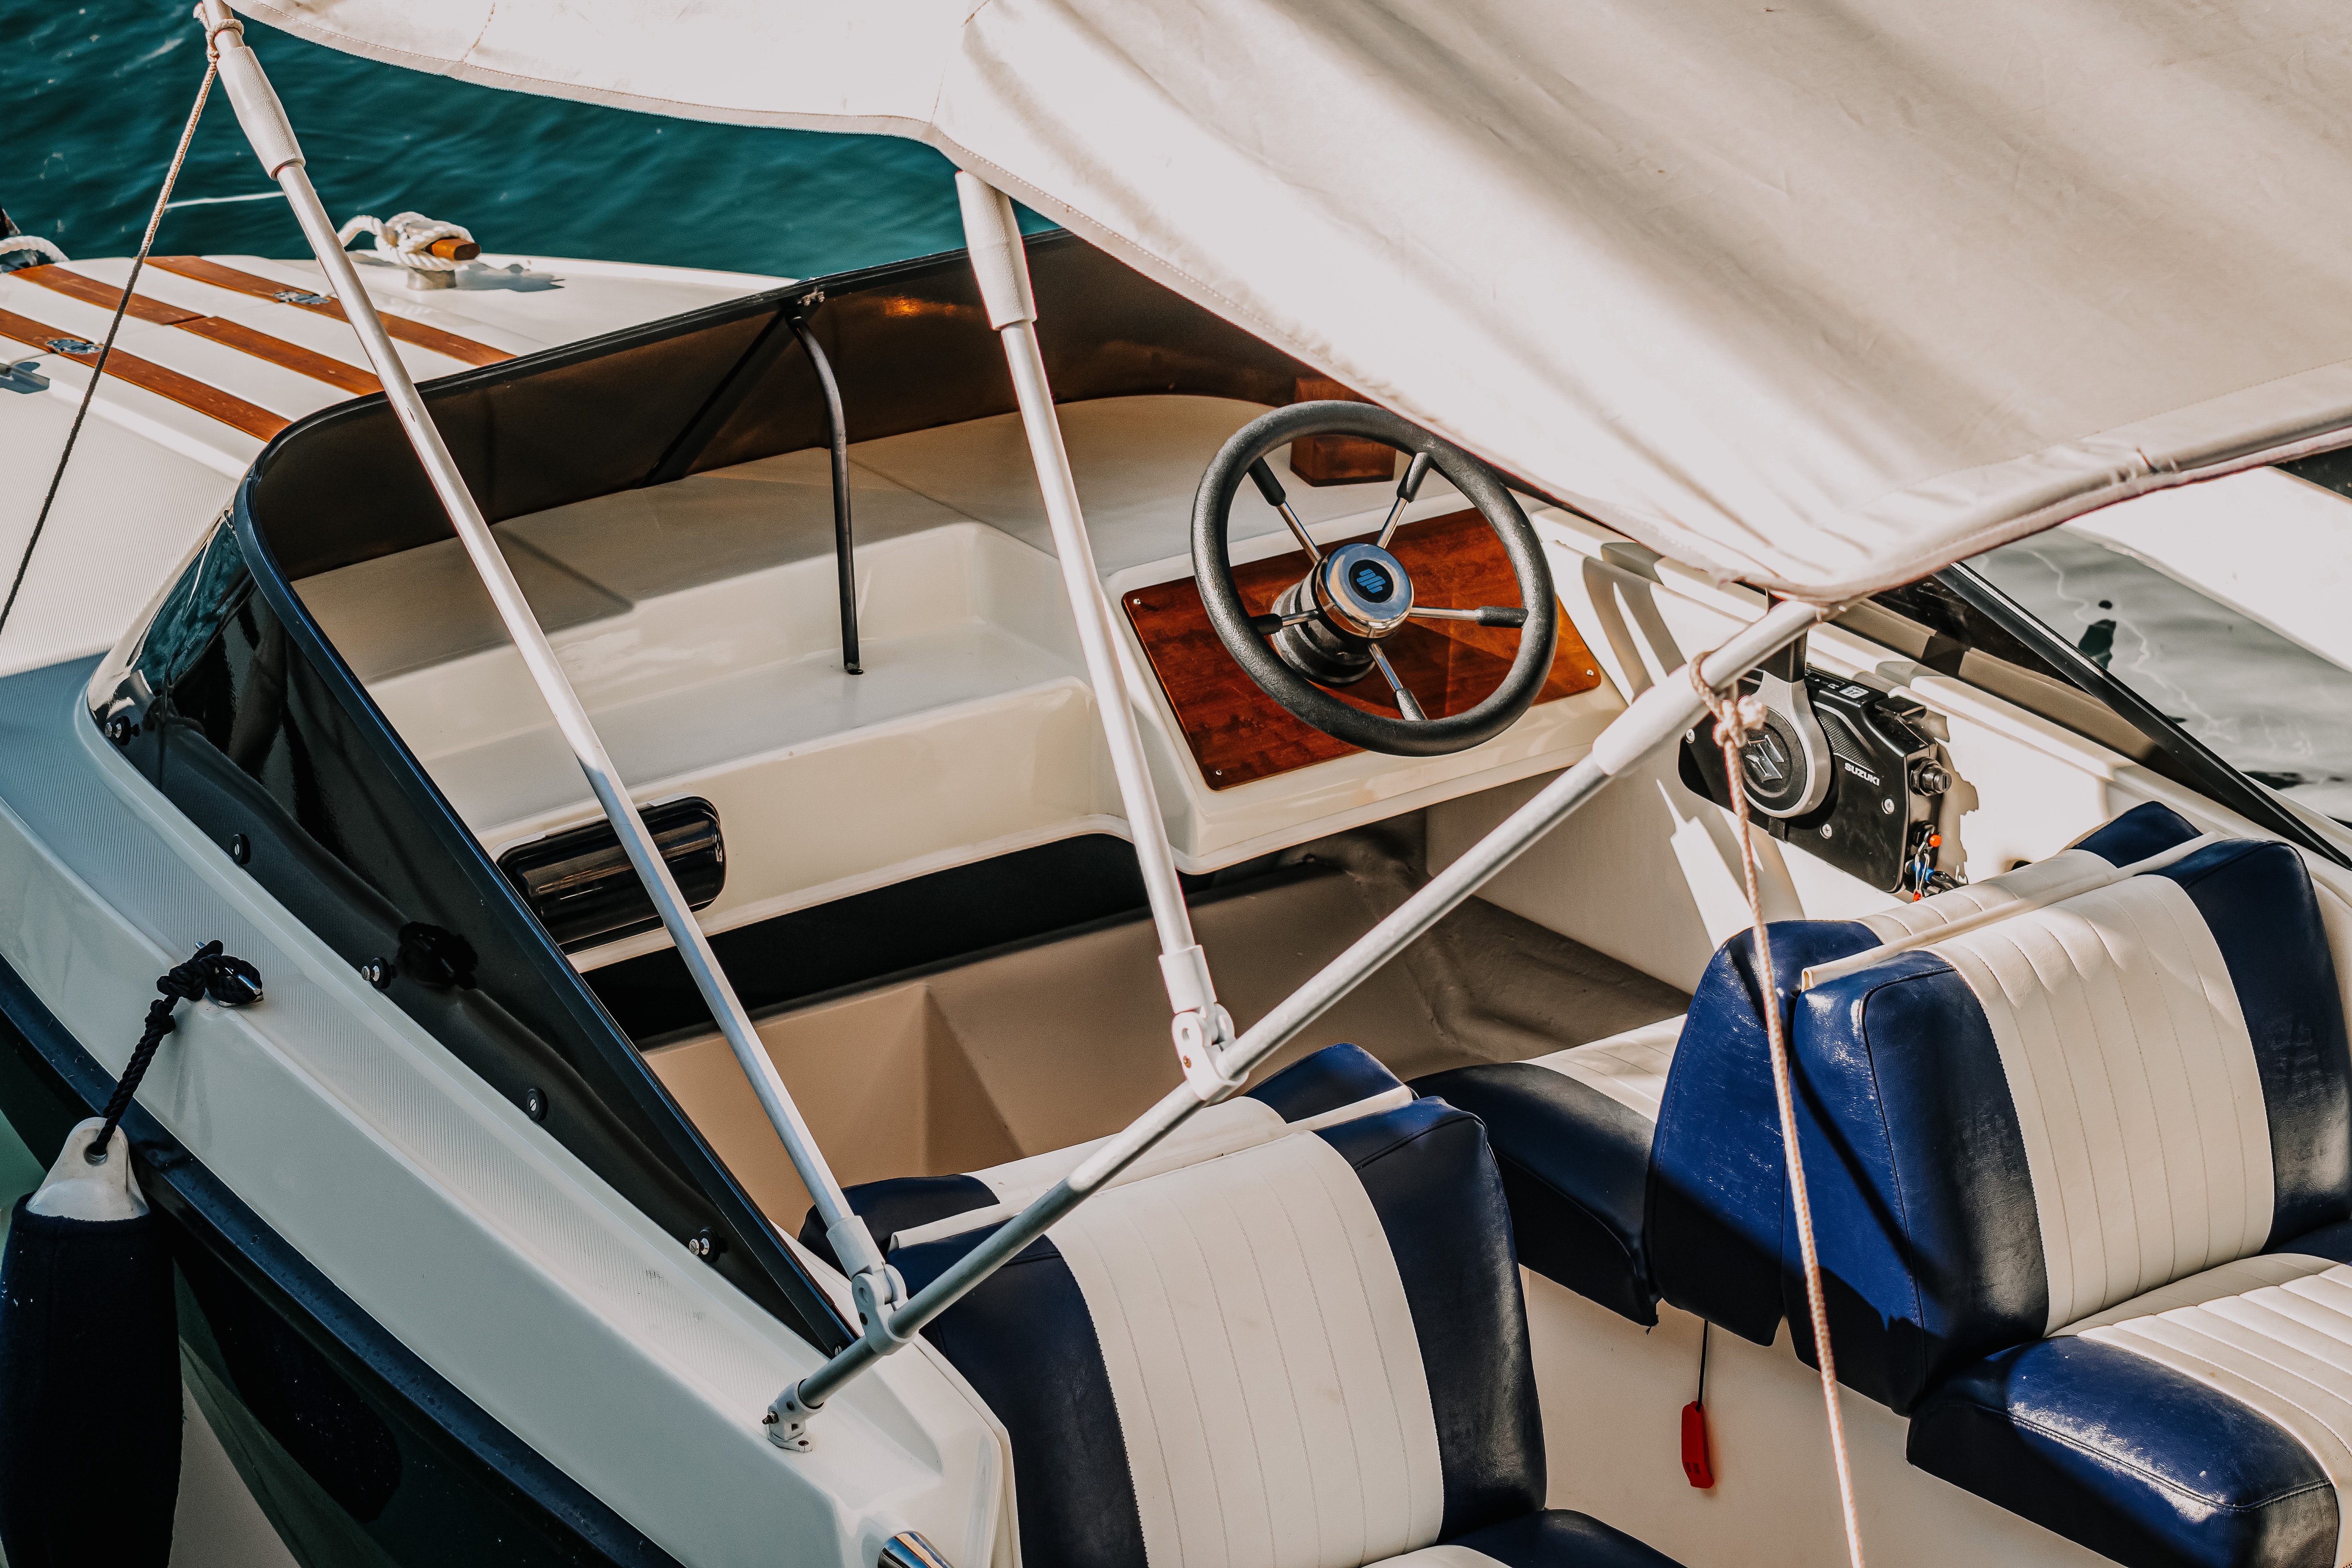
How to Clean a Boat's Interior
There are many ways to keep the exterior of a boat clean and shiny. Removing dirt and scratches, compounding, polishing, and more are all common techniques used in the boat detailing community. However, the interior of your boat should never be overlooked. If things start to fall apart inside due to lack of care, it doesn’t matter how shiny the outside of the boat is.
Interior Care is Critical – Here’s Why
Note: Found this image on the Dekit website -- Is it ok to use?
Passengers and captains alike spend so much time inside the boat. Whether it’s to grab a snack, get out of the sunlight, or simply just take a seat at the table, people are always using the inside of the boat. Just like UV rays can damage external parts of the boat, the sun can also wreak havoc on interior trim and leather areas, causing them to dry out or fade. To keep your boat comfortable for years to come, taking care of its interior is critical.
Carpet Versus Foam Flooring
On boats, carpet will take a beating. Carpet is not exactly known for doing well with water, sand, and other substances that come with the boating experience. It can easily get matted, grimy, and worn down if not cared for properly. Here are all the steps behind maintaining a carpeted deck:
- Remove floor mats often and shake them out, but be careful not to dump rocks, sand, and other debris on the boat’s floor when you’re removing them. You want that stuff OUT of the boat, not in it.
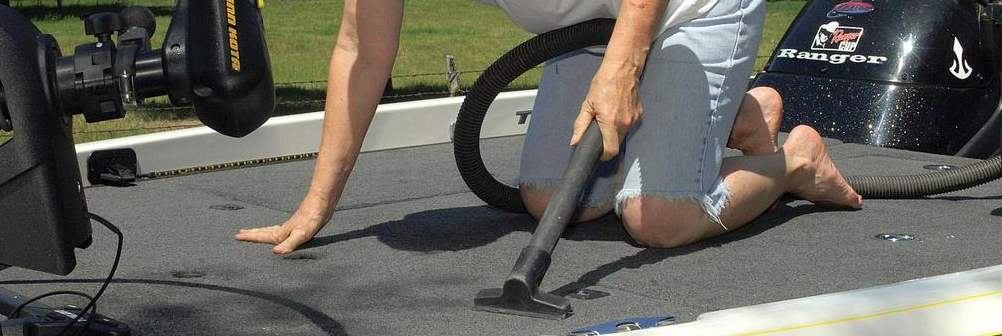
- Vacuum regularly. A quick vacuum after each time on the water will remove all the sand and dirt, keeping your carpet fresh. We recommend getting a handheld vacuum to keep inside the boat for easy access.
- A firm bristle brush-down every now and then can help remove harder-to-get debris or separate areas of carpet that are starting to get matted.
- Treat any stains with fabric cleaner, leaving the solution on as directed, usually for a minute or two, before scrubbing it with a bristle brush.
- When your carpet is clean, use a fabric protector that will help protect it from all future messes.
Although there is nothing wrong with maintaining carpets on boats, you can avoid this whole process by switching to foam floors like those offered by DEKit. These are long-lasting and durable. They’re also UV resistant and absorbent, which means they won’t stain your deck.
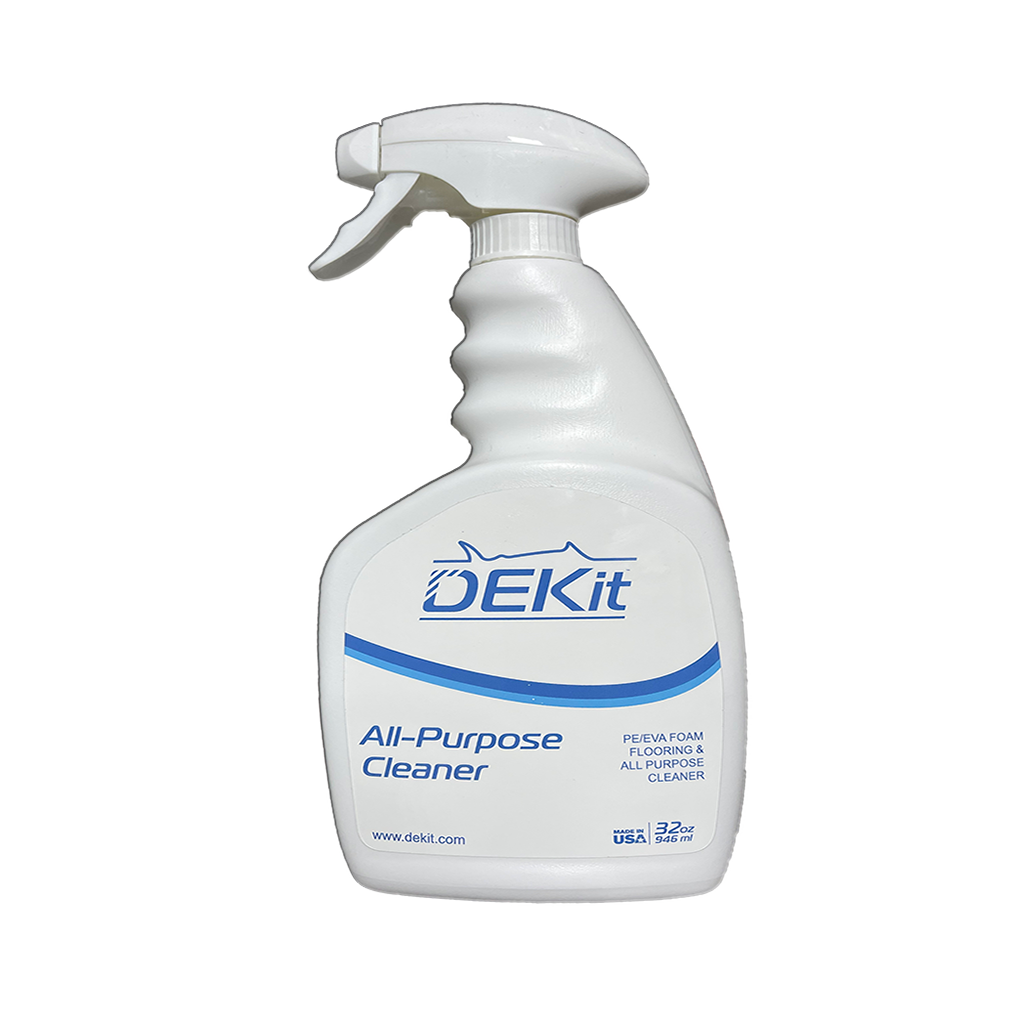
For foam flooring, you can use a good foaming agent such as DEKit’s Foam Cleanser. Not only does this do an excellent job cleaning your foam, but it also works on tough stains on your hull and gel coat.
Do yourself a favor and get rid of the carpet. It will save you a ton of time and headaches!
The Process of Cleaning Interior Trim
Invest in a good cleaning solution for whatever material you have on the interior of your boat. Vinyl, plastic, and rubber are commonly seen, and using a good cleaning solution every few months can help keep the interior looking brand new. There are also protectants that offer protection from damaging UV rays; use these to avoid fading and discoloration.
How to Care for Vinyl Seats
Vinyl is a polymer material. Polymer means that its molecules are long chains of carbon atoms that bind together. This makes vinyl very durable and resistant to damage. Vinyl is also lighter than other types of plastic, making it ideal for boats. And because it has no pores, it does not absorb water or oil. That’s why vinyl is perfect for boats.
Although vinyl offers more flexibility than something like leather, it still needs to be maintained regularly. An all-in-one product can usually get the job done.
An All-In-One Vinyl Protectant
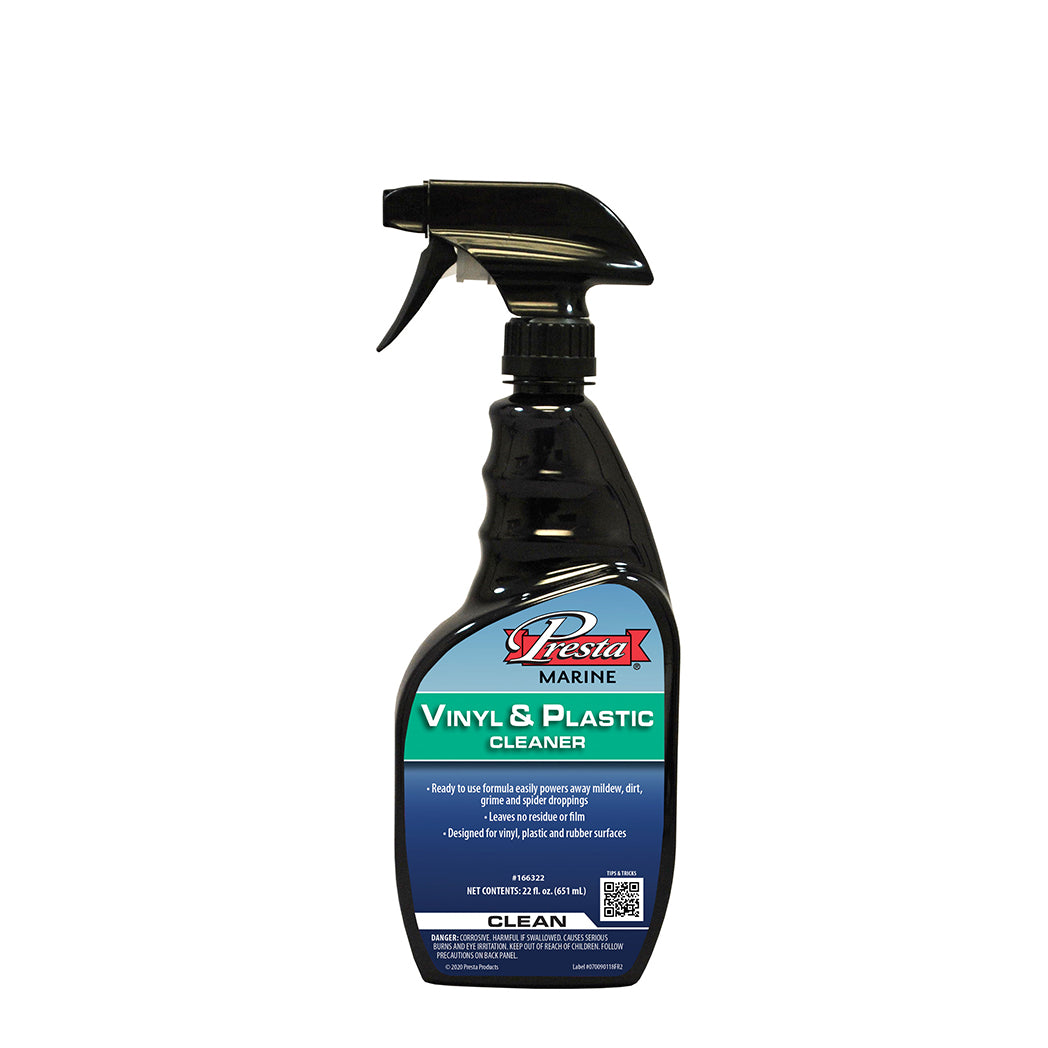
Presta offers a killer ready-to-use formula that mildew, dirt, grime, and more. We recommend it to all our customers for vinyl care because it leaves no residue or film and penetrates deep into pores to remove embedded soils.
This product is our go-to choice for vinyl, plastic, and rubber surfaces.
How to Care for Interior Glass
Properly coated class is an important part of maintenance.
Glass coating serves a couple of functional purposes. First, glass coating makes the surface of the glass hydrophobic, meaning that it repels water and makes your glass easier to maintain. Second, the hydrophobic properties make it easier to see through rain or snow. This isn’t a step you want to skip, as it contributes to the safety and longevity of your boat.
In addition to protecting the exterior of glass, it’s also vital to protect the inside. Interior glass can crack over time or become scratched easily if neglected. We recommend polishing and coating your class to prevent these problems from occurring.
Here are the tools you’ll need: a rotary machine, Starke Yacht Care Glass Polish, Lake Country HDO Pads, Venom Water Spot Remover, Starke Yacht Care Surface Prep Alcohol Spray, a microsuede applicator sponge, a standard microfiber, and THOR Marine Nano Ceramic Coating.
Watch the video below to learn how we get this process done at Marine Detail Supply Tampa Bay.
A Boat is Only as Clean as the Interior
If your boat is your pride and joy, don’t forget to take care of its interior. Sure, other boaters on the water may never see the elbow grease you put into your leather seats, but you and your loved ones will, and that’s what matters.

5 Machines Every Detailer Should Have
As a boat detailer, investing in the right machines can make a world of difference. Great tools and machines can make a major difference in how difficult a detailing job is and how well it turns out. We’d never recommend that detailers purchase more machines than necessary or break their budget to get the new, shiny tools, but we do think having the right machines is a great starting point. Here are five machines every detailer should invest in:
Rotary Buffers
Great for tough oxidation areas or deep scratches, rotary buffers are a must-have for any detailer. These machines work wonders, providing a smooth, damage-free surface area when the job is done. With a range of speeds from 600-3000 RPMs, rotary buffers can tackle many types of scratches or surface damage. By heating up the surface area, buffers are a great way to smooth out gel coats on even the toughest of jobs.
With great power comes great responsibility; if used incorrectly, rotary buffers can lead to damage on boats, so be mindful of the power and pressure you’re placing on the surface. It’s best to keep the buffers moving at a steady pace so the surface area doesn’t get too hot, and no lasting damage is done.
Polishers
We’re all chasing the perfect glossy finish before handing the boat back to its owners, and polishers are the way to do that. With many polishers out there, it can be hard to know when to use which one. Below are four polishers you should have on hand:
Dual-Action Polisher
With a spinning AND oscillating movement pattern, dual-action polishers greatly reduce the potential of damaging a vessel while still providing some powerful “elbow grease” when needed. The spinning is offset by the oscillation, helping to ensure a smooth polishing process that doesn’t put too much heat or pressure on the boat. Though these polishers are notorious for being stronger than rotary buffers, the ease of use and lack of potential problems make them great for beginners who are up against some big jobs.
Long-Throw Polisher
Similar to a dual-action polisher but with a wider oscillation pattern, long-throw polishers build more friction and have a larger reach than their counterparts. Capable of offering more correction than a standard dual action polisher but still relatively free of challenges for new users, long-throw polishers are great to have on hand.
Forced Rotation Polisher
With most polishers, if you place enough pressure on the pad, the machine will stop spinning. However, a force rotation polisher works exactly as it sounds and will not stop spinning no matter how much pressure is applied. It’s an incredibly powerful tool that can work through moderate to heavy scratches but is still less likely to overheat and cause damage than rotary buffers.
Let the Machines Do the Heavy Lifting
With the right machines on hand, you’ll have enough power to work through detailing jobs efficiently and effectively. When you’re first starting out, it can be challenging to know when to use which machine, but with time, you’ll start to develop your personal preferences. Even with the best tools available, detailers will naturally build an approach that works best for them.

How to Choose the Right Buffing Pads
When it comes to boat detailing, you’ll need to invest in a few different types of buffing pads. Made out of a variety of materials and best used in different situations, having a number of buffing pads on hand will ensure you can do each job with the right supplies.
What are Buffing Pads?
Buffing pads are circular pads that connect to orbiters and polishers, making it easier to remove scratches on boats and apply different products to the vessel you’re detailing. Buffing pads can hold more solution than a rag, and since they can be attached to machines, can process detailing jobs with more ease and efficiency.
Types of Pads and When to Use Them
There are many buffing pads on the market, and some are best in certain situations while others will be needed in other situations. If you keep all of the below pads on hand, you’re sure to have access to the one that best suits your needs every time.
Foam Pads
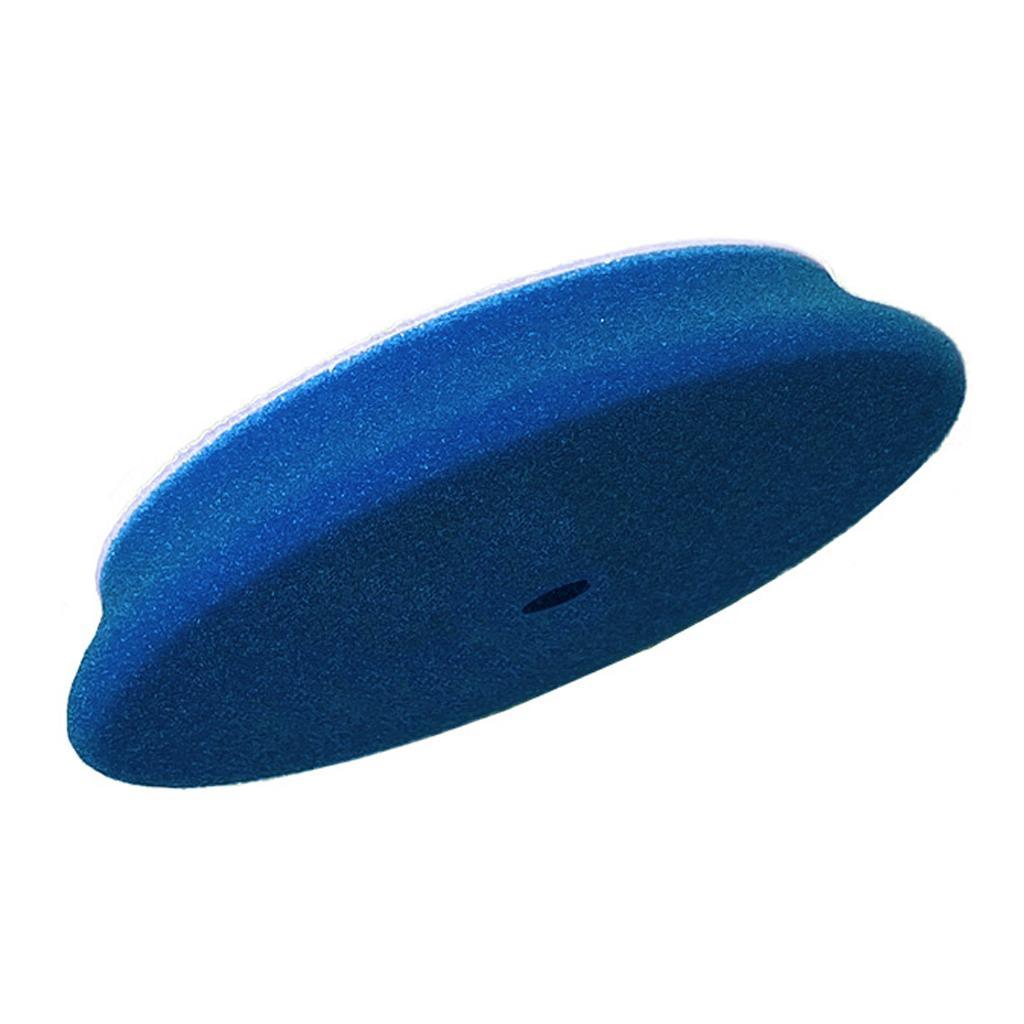
Made from foam, these pads can be used for different jobs such as compounding, polishing, or finishing, depending on the makeup of the pad. Generally, stiffer foam pads are used for harder jobs that require more abrasive power to cut through scratches or other damage.
Compounding Pads

When you need to work through heavy oxidation or remove deeper scratches, compounding pads are the way to go. These offer more abrasive surfaces and act like very fine sandpaper, removing scratches and blemishes with ease. Compounding pads can get very hot and are more likely than other pads to cause damage if used improperly.
Polishing Pads

To refine scratches to where there are no longer visible, polishing pads are a great tool. They contain finer abrasives than the ones used in compounding pads and are used to apply liquid polishes or glazes.
Finishing Pads

Often used for the last step of a detailing job, finishing pads are perfect for applying a sealant or wax to lock in the freshly finished shine. These pads will help bring out the “just-detailed” boat glow that makes boaters gleam with pride.
Wool Pads
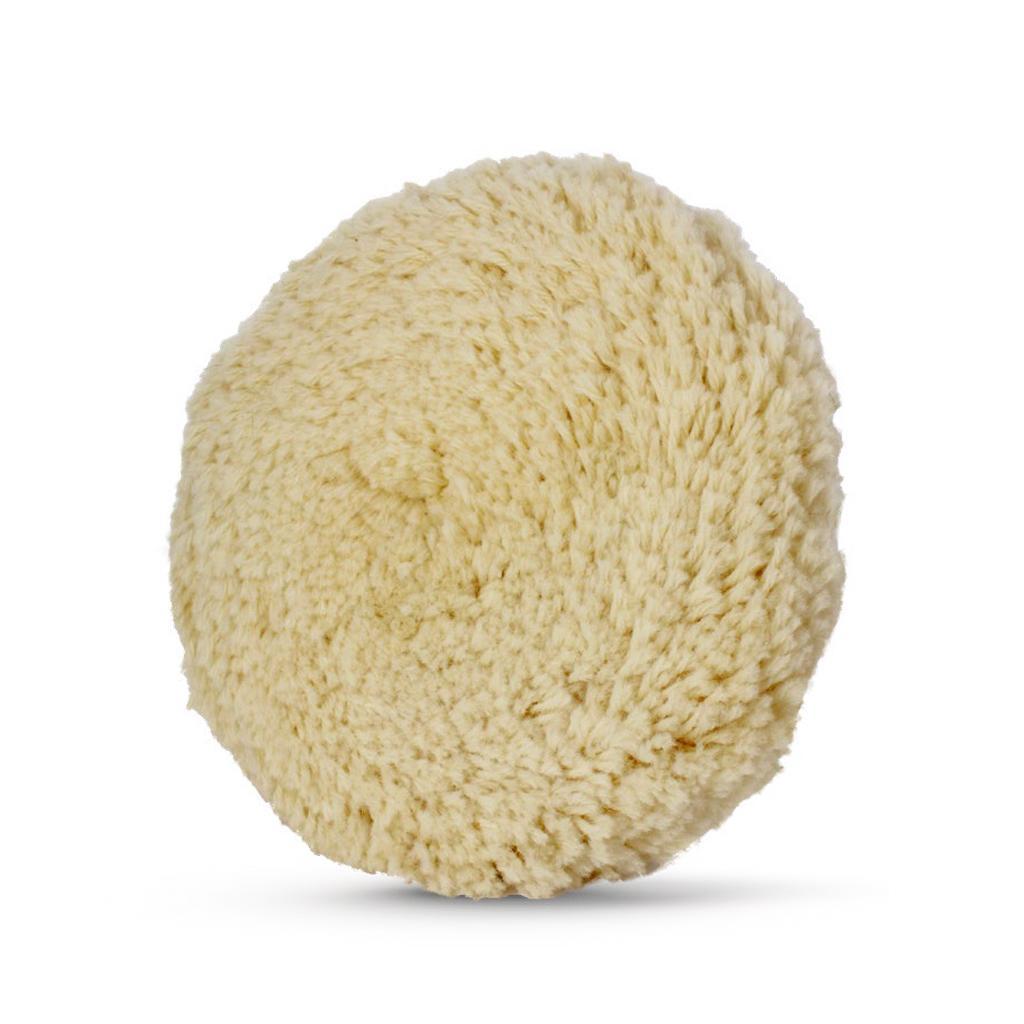
Wool pads, similar to foam pads, offer a range of uses, depending on what the pad is designed for. You can find aggressive, compounding wool pads or milder finishing wool pads, depending on your needs. Even if you use a wool pad for finishing, you may need to supplement with a foam pad at the very end because wool is an abrasive material.
Textured Pads

Manufacturers of textured pads claim that these pads don’t build heat as easily as their non-textured counterparts, leaving less room for errors. However, detailers have mixed reviews on the effectiveness of textured pads, and often opt for flat, cheaper pads instead.
Microfiber Pads

Microfiber pads are relatively new in the detailing world, but they can be used for compounding and polishing too. Usually, they are more abrasive than foam pads and will need to be followed up by a foam pad to get the proper finish on a detailing job.
Replace Pads When Needed
You can wash and reuse each pad a few times, depending on the quality and material of the pad, but be sure to replace pads when needed. In the grand scheme of things, pads are inexpensive and can make a huge difference in the quality of your detailing job. If a pad looks worn in, is losing its ability to remove scratches, or simply isn’t cooperating like it used to, it’s time to buy new ones.

Best Heavy Cut Compounds for Boat Detailing Jobs
Boats are put through a lot; damage from the hot sun, salt from the ocean, scratches from debris, and more, can create stained and oxidized gel coats that need a refresher! When it’s time to work through scratches, scuff, or other boat damage, you'll need the right protective products, and a quality heavy-cut compound is the best place to start. Medium cut compounds might do the job for less damaged boats, but if you have a vessel in desperate need of some TLC, it’s best to have a heavy cut compound on hand. Below are some of our favorites:
Level R
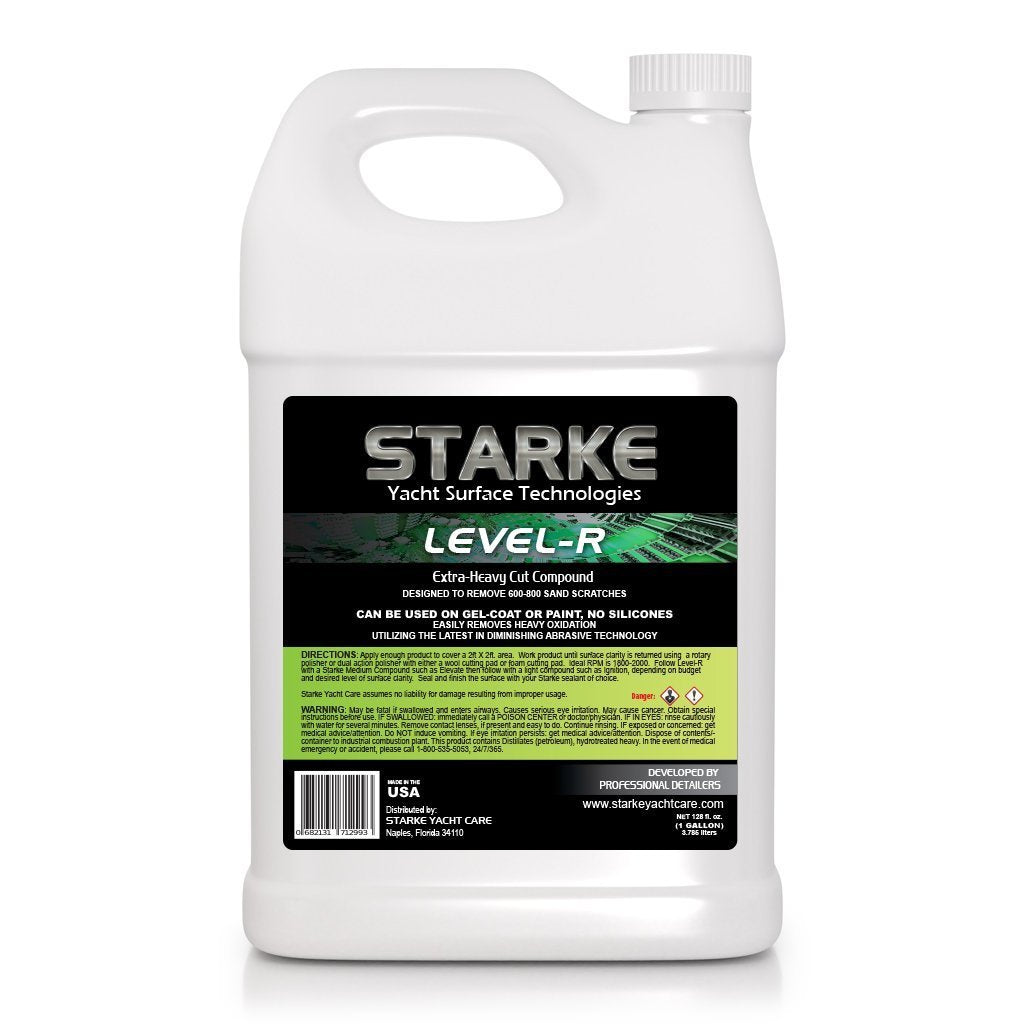
Starke Level R is a favorite amongst professional detailers. Not only can it cut through deep scratches and surface damage, but it finishes really nicely due to its diminishing abrasive. When Level R heats up as you use a rotary polisher on it, it turns into a finer compound that will leave a shiny surface and remove any damage. You can even get away with foregoing the polishing step after using Level R if you’re in a pinch; it’s like magic!
Menzerna
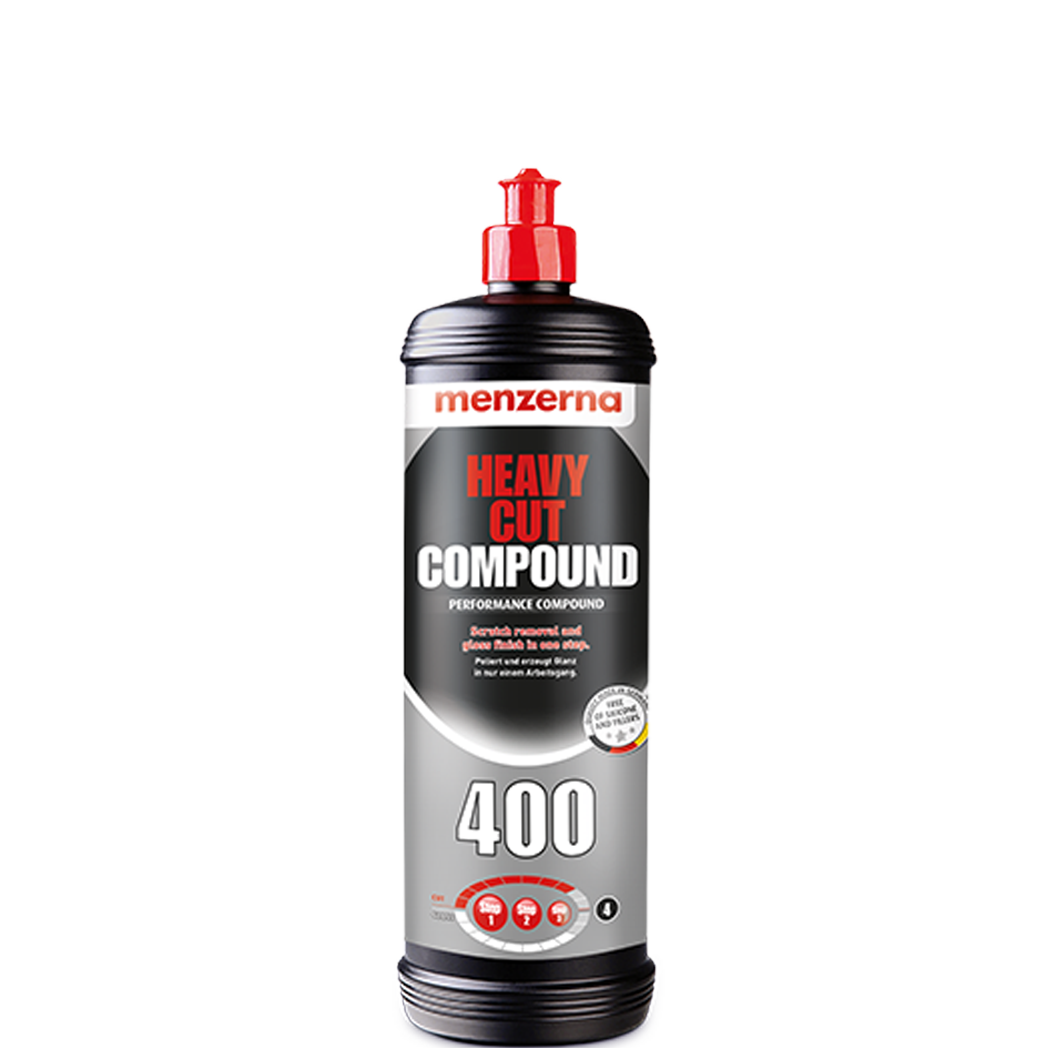
Another great heavy cut compound, Menzerna has a line of multiple heavy cut compounds, depending on your needs. Known for being easy to work with, Menzerna can feel a bit oily as you work, but that extra oil helps keep the product workable for longer. Since a little goes a long way, it ends up being a very cost-effective solution if you’re on the market for a heavy cut compound.
Koch-Chemie

With an excellent working time and low-dust qualities, Koch-Chemie’s heavy cut compound is very popular for boat and car detailing jobs. It wipes off easily and won’t require additional washing in between detailing steps. Though it leaves a nice shine, we still recommend finishing with a polish if you’re using this product.
Restructure

Restructure doesn’t have the same cutting power as some of the other heavy cut compounds listed above, but it’s great for removing moderate scratches and marks. It is fairly wet, so this is one of the best products if you’re working outside in the hot sun and need a lot of time to get the job done. Since you have a bit more working time, Restructure’s effectiveness might surprise you.
Presta Super Cut

Presta won’t remove the same levels of oxidation as any of the others in this list, but it’s still a very popular heavy cut compound for light scratches and oxidation. It also does not finish with the same level of shine that you will find among other brands, so you’ll definitely need to finish with a polish for a flawless finish.
Finding the Right Compound for a Flawless Finish
At the end of the day, the best compound for you will come down to personal preference. You may love Starke Level R and another professional detailer may prefer Menzerna. All of these brands come with pros and cons, but the most important thing is that you’re detailing your boat regularly to give it the longest, shiniest life possible.

How to Clean Boat Detailing Pads
We know that pads are used to clean and polish but taking proper care of your pads will help them last longer and allow you to purchase fewer replacement pads. The steps are simple, and the process is well worth it. We’ll break down everything you need to know about cleaning pads below.
Recommended Supplies
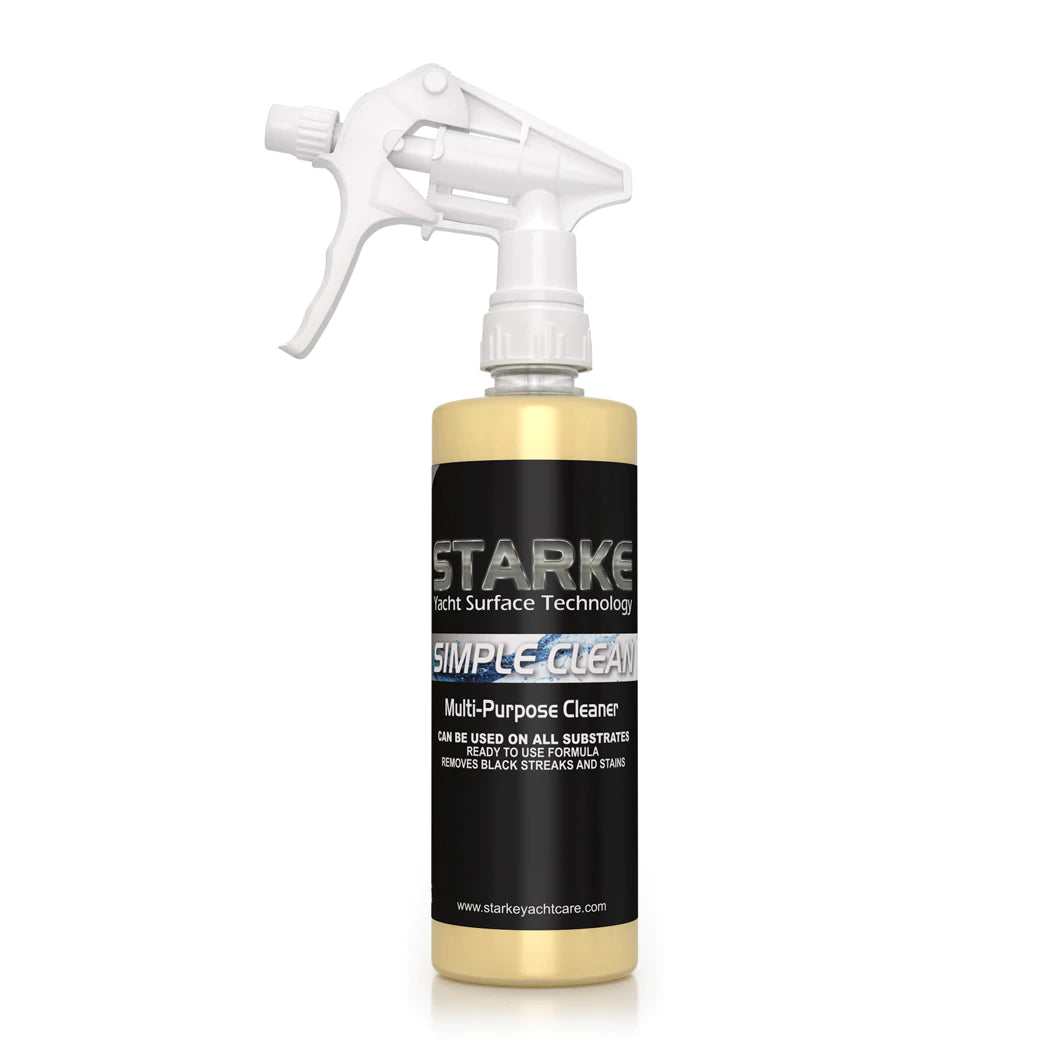
To get started, round up all the dirty, but salvageable pads. Then, get 2 large buckets, some Dawn Dish Soap, and Starke Simple Clean Multi-Purpose Cleaner. You probably already have most of the supplies on hand, but if not you should be able to order them quickly.
Step 1: Spray Down Pads

Use the Starke Simple Clean Multi-Purpose Cleaner and spray each pad with a healthy amount of the solution. It does not need to be completely saturated or dripping, but spraying the solution on some of the most damaged areas will help get the pad as clean as possible.
Step 2: Soak Pads
Next, fill one of the buckets with warm water, Dawn Dish Soap, and some of the Starke Simple Clean, then throw all the pads in the bucket. You’ll want to soak them for about 2 hours or more if possible. Remember, the longer you soak them, the easier it will be to lift the oils out.
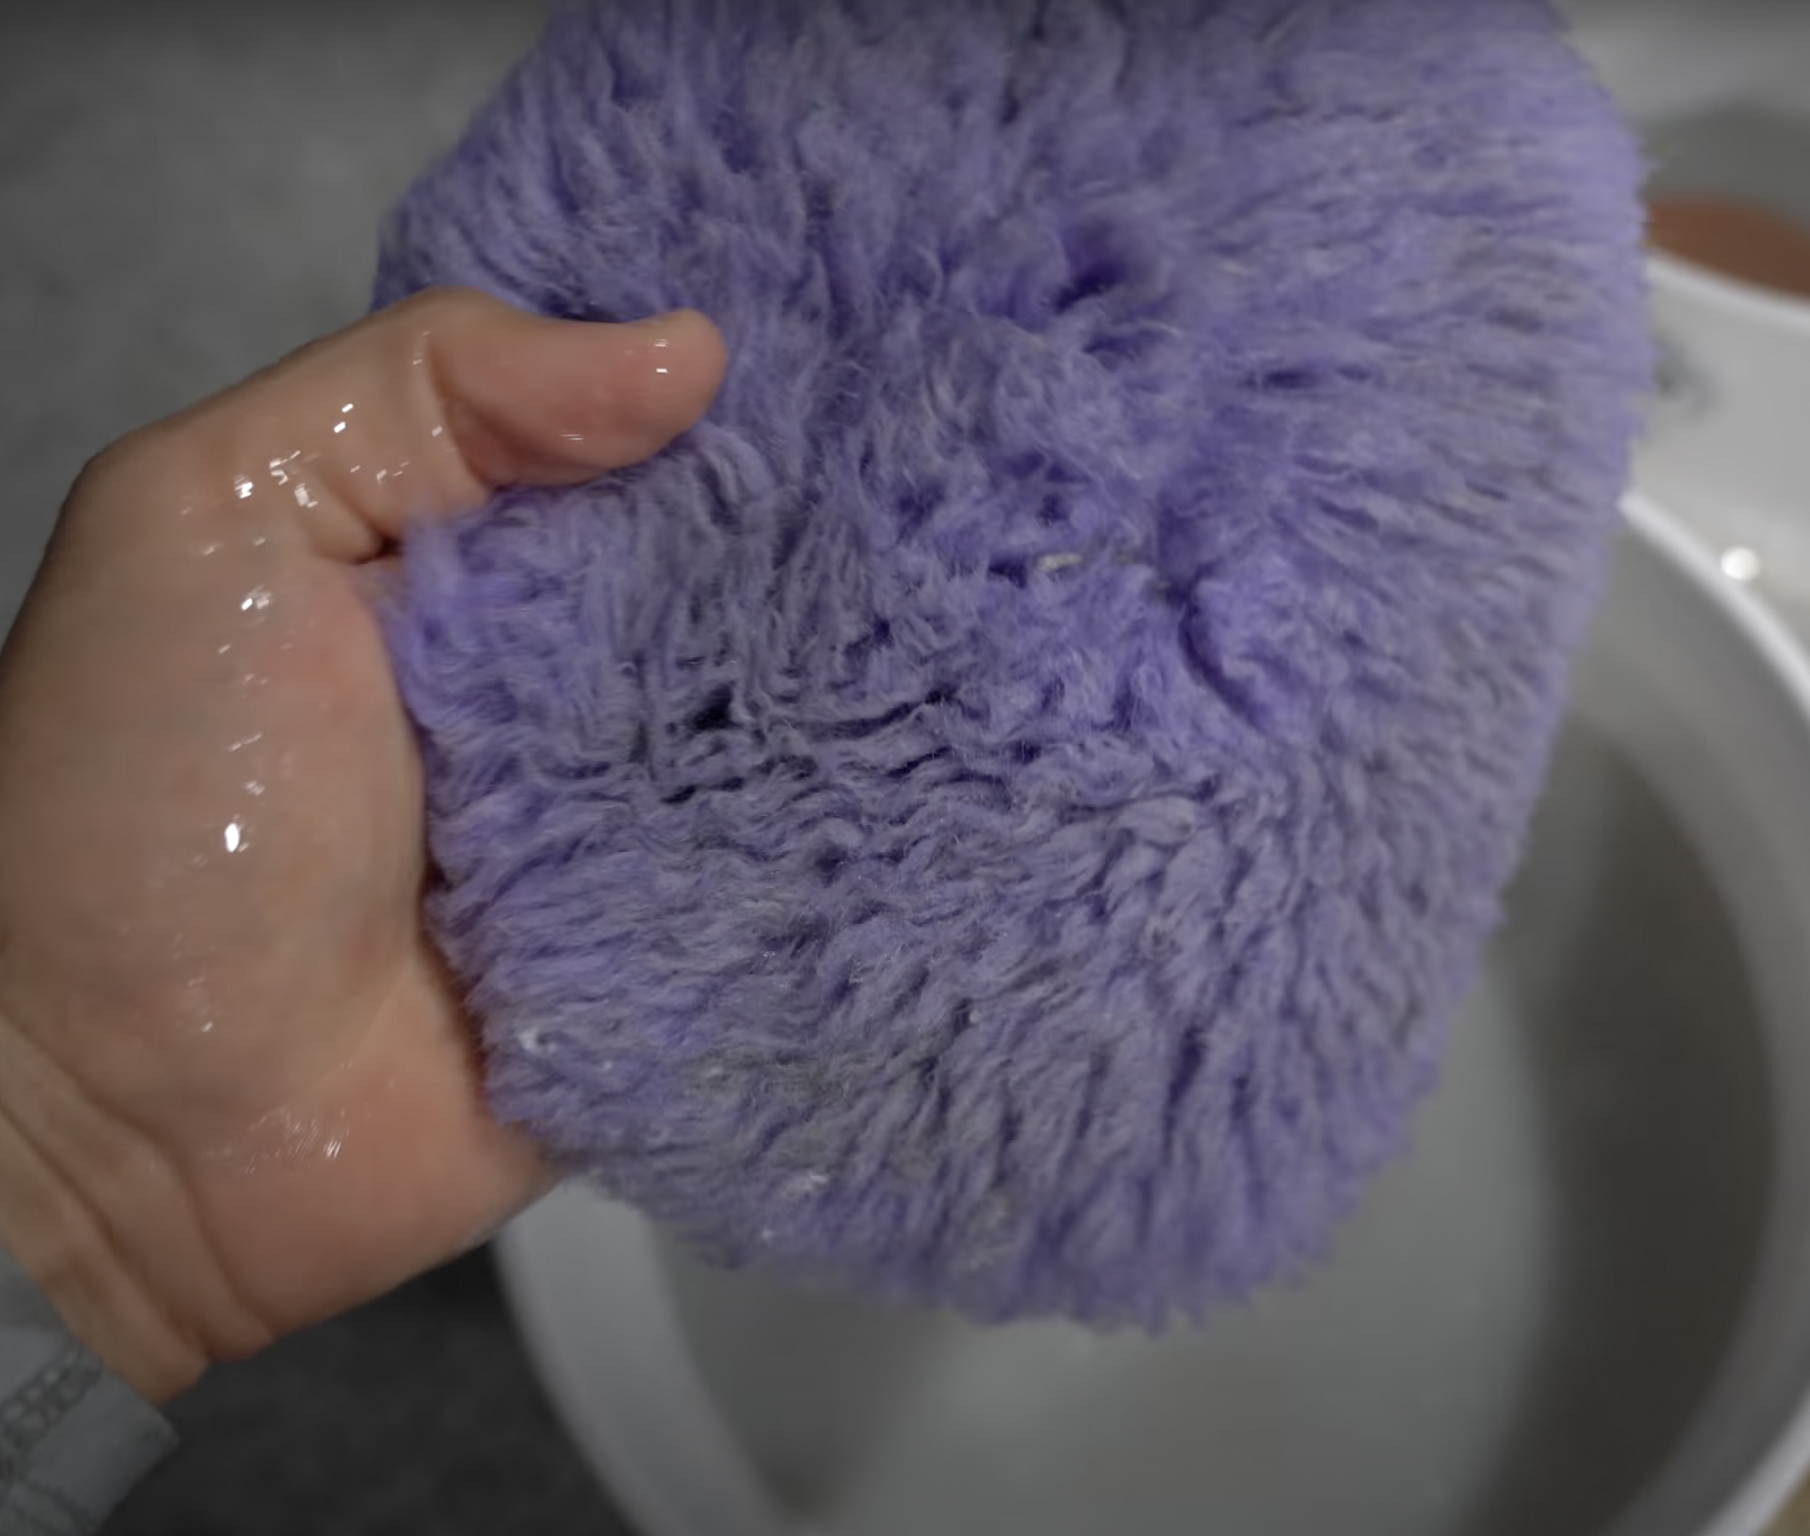
Step 3: Brush Pads

While your pads are soaking, you can pull each one out and give it a good brush with a drill brush. This can help the wool pads such as the Lake Country Wool Cutting Pad get a bit of their fluff back. With wool pads, the fibers can become matted together, but soaking and brushing them will separate the strands and bring the pad back to life. This is an optional step and may not be necessary for polishing pads such as the HDO Polish Pad or the SDO Orbital Polishing Pad.
Step 4: Rinse Pads
After your pads have been brushed and are done soaking, you need to take each pad out and rinse it off well, removing as much remaining dirt and grime as possible, as well as lifting any leftover soap or cleaner residue out of the pads.
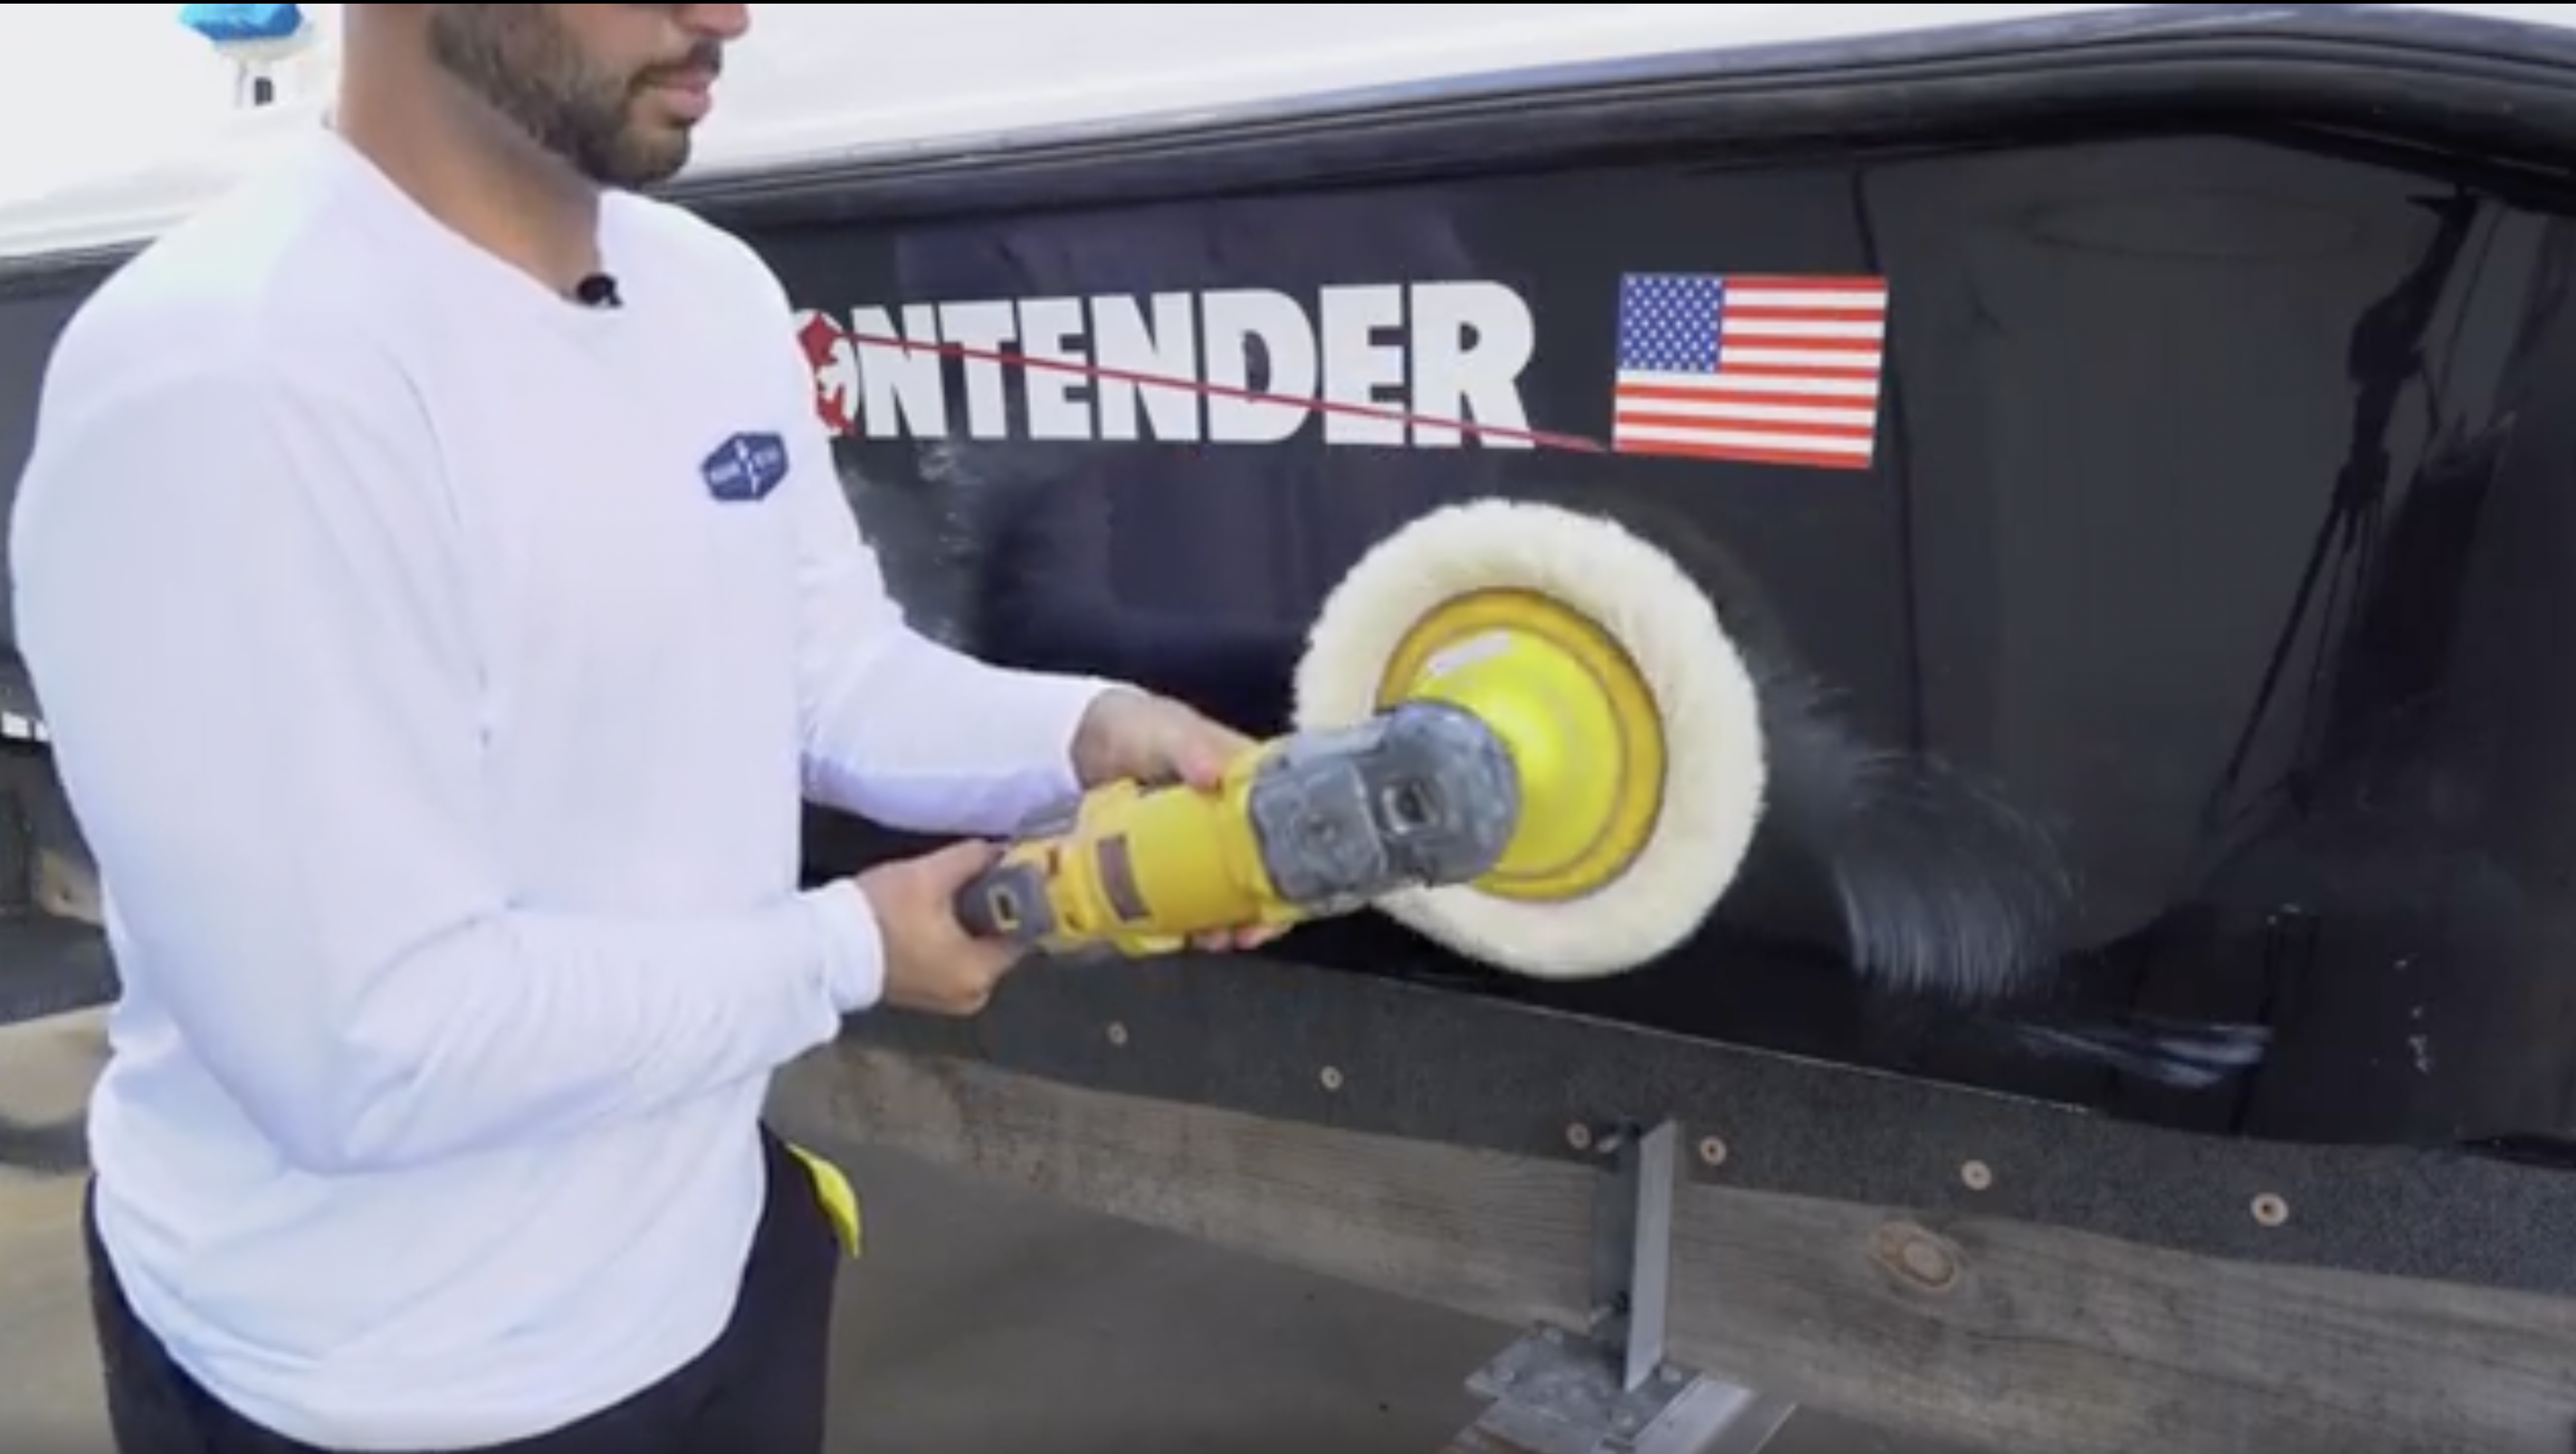
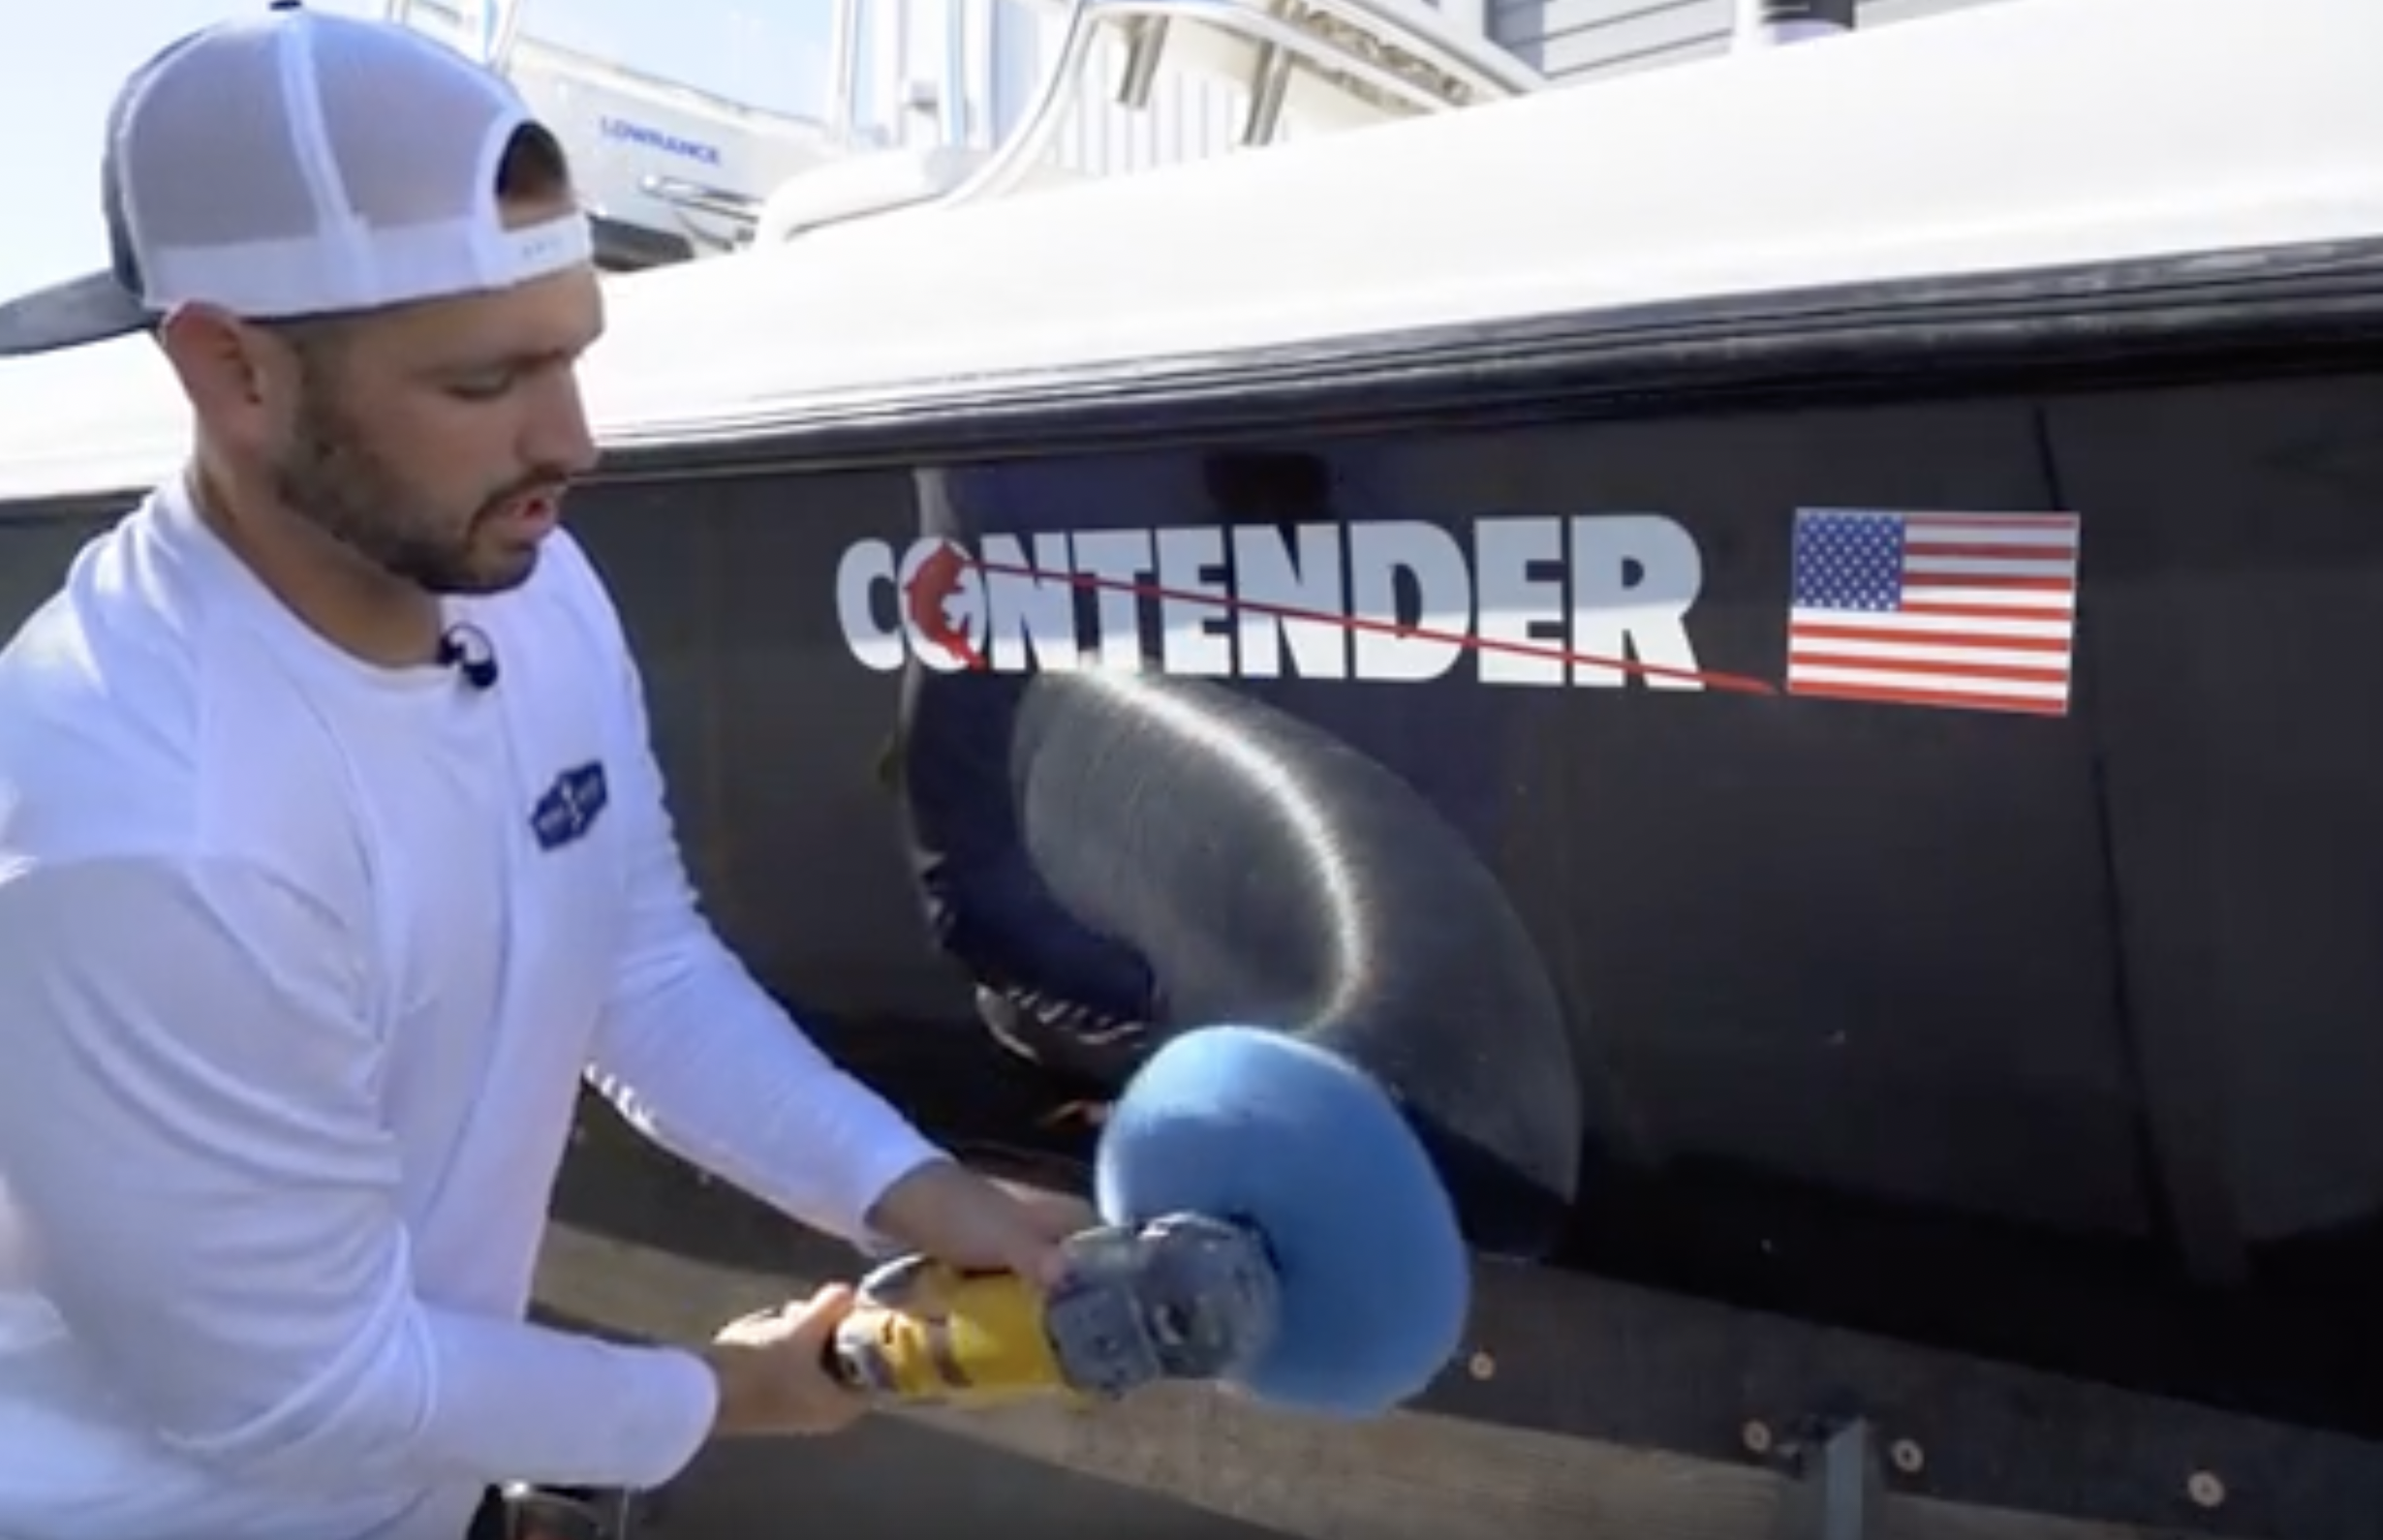
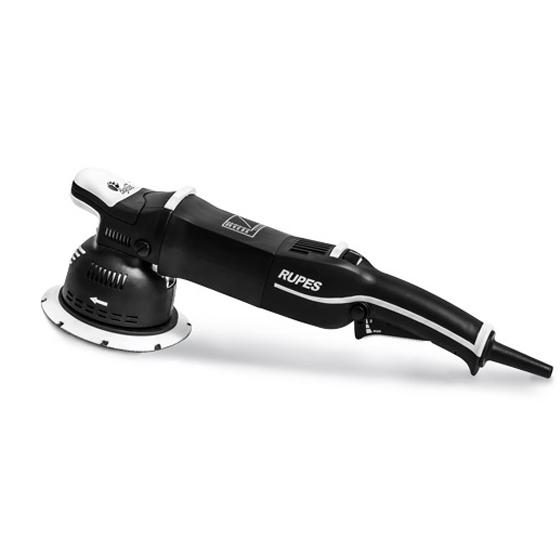
Step 5: Spin on Rotary Machine

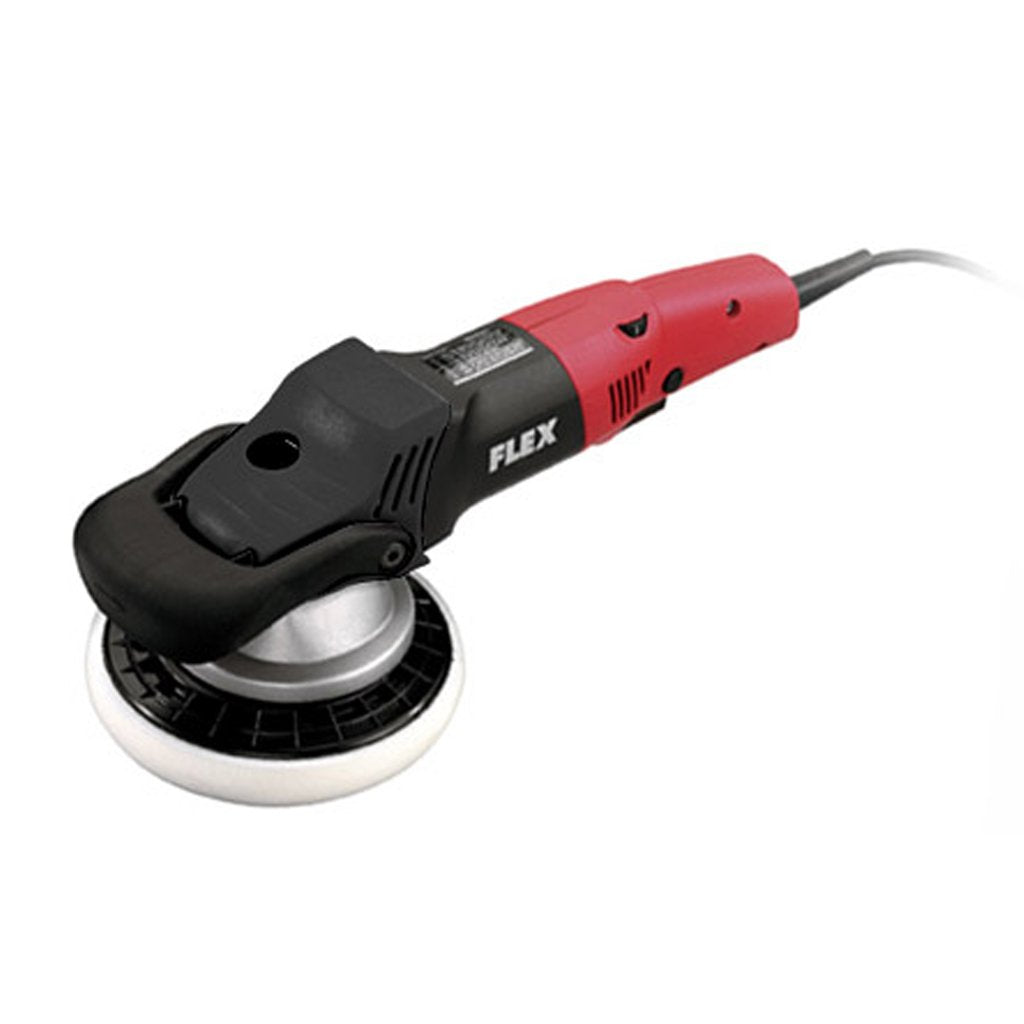
When the pads are clean but still wet, you can use the FLEX PE 150 to dry them quickly. Simply attach each pad and turn the rotary on a level 1 speed for a few seconds, then crank it up to a level 6 and let the pad spin for about a minute. After this step, the pads should be mostly dry, but by letting them sit in the sun for another hour or so, you can use them to work later in the day.
How to Know When It’s Time to Clean Your Pads

It’s important to be able to recognize when a pad needs to be cleaned or needs to be thrown away. Sometimes, if pads are used to polish a large boat, they won’t be able to be used again. However, when pads still have some fluff but are starting to get matter or discolored, cleaning them can bring new life to the pads.
Clean Pads, Cleaner Boat
Taking care of your boat is critical, but don’t forget to take care of the tools and supplies that you use on your boat, too. By cleaning your pads instead of throwing them away when possible, you’ll get better results from detailing and spend less money on pads in the long run.
Watch how I clean my own boat detailing pads in the video below!